RSS

Elasticsearch cluster using docker-compose, with basic security and snapshots

For a single-node docker deployment see here: https://evolpin.wordpress.com/2020/12/29/elasticsearch-single-node-using-docker-kibana-with-snapshots-config-and-basic-security/

Although a single-node docker deployment is a good solution for development, I was interested seeing how to deploy multiple nodes with dedicated roles. Elasticsearch webinars and documentation specify a wide range of node roles, but their documentation example for docker-compose only demonstrates a standard 3 general purpose nodes. So. if you are only interested in that you can easily copy the example here. I was interested more in setting up various node roles alongside basic security, snapshots and configuration. Therefore I combined some minimal setup using the Elasticsearch documentation, specifically this: setting up a multi-node cluster with TLS.

Disclaimer: this post is heavily relying on the good work and documentation done by Elasticsearch, done with minor changes to accomplish what I was looking for.

Setup

Consider creating a top-level parent folder, which will contain subfolders for backups, config and data. On my dev machine this looks like this:

  • F:\Projects\Elasticsearch\docker_compose_security
    • backups
    • certs
    • config
      • elasticsearch.yml
      • kibana.yml
    • data
      • data01
      • data02
      • data03
      • data04

Note: I am pre-creating the dataXX subfolders, as I had noticed that sometimes if I do not, Elasticsearch nodes complain about lack of permissions.

Setting up a cluster with master and data nodes, config, basic security and snapshots.

Elasticsearch documentation specifies that: “The vm.max_map_count kernel setting must be set to at least 262144 for production use.” I had noticed that this was also required on my dev machine. More over, at times (usually after vmmem increased over 8GB and seems to have crashed docker), this settings was reset back to its default and I had to change it again. Anyhow on Windows with Docker Desktop using WSL2 this is done like so:

wsl -d docker-desktop
sysctl -w vm.max_map_count=262144
  1. Within the config folder, create elasticsearch.yml file with the following configuration:
cluster.name: "es-docker-cluster"
network.host: 0.0.0.0
cluster.routing.allocation.disk.watermark.low: 10gb
cluster.routing.allocation.disk.watermark.high: 5gb
cluster.routing.allocation.disk.watermark.flood_stage: 1gb
cluster.info.update.interval: 1m
path:
  repo:
    - "/my_backup"

Note: you can change the watermarks or remove them completely.

  1. Create kibana.yml file with the following configuration:
server.name: kibana
server.host: "0"
monitoring.ui.container.elasticsearch.enabled: true
  1. TLS

Unfortunately, unlike the single-node deployment, for multi-node deployment with basic security enabled, you are required to create certificates and configure your deployment to use them.

Reusing the Elasticsearch documentation for TLS deployment, I created the following files with minor changes.

instances.yml (will be used to create certificates for 5 nodes):

instances:
  - name: es01
    dns:
      - es01 
      - localhost
    ip:
      - 127.0.0.1

  - name: es02
    dns:
      - es02
      - localhost
    ip:
      - 127.0.0.1
      
  - name: es03
    dns:
      - es03
      - localhost
    ip:
      - 127.0.0.1

  - name: es04
    dns:
      - es04
      - localhost
    ip:
      - 127.0.0.1

  - name: 'kib01'
    dns: 
      - kib01
      - localhost

.env (used by docker-compose as env variables; change ROOT as required):

COMPOSE_PROJECT_NAME=es 
CERTS_DIR=/usr/share/elasticsearch/config/certificates 
VERSION=7.10.1
ROOT=F:\Projects\Elasticsearch\docker_compose_security

create-certs.yml (this will generate certificates according to the instances.yml file):

version: '2.2'

services:
  create_certs:
    image: docker.elastic.co/elasticsearch/elasticsearch:${VERSION}
    container_name: create_certs
    command: >
      bash -c '
        yum install -y -q -e 0 unzip;
        if [[ ! -f /certs/bundle.zip ]]; then
          bin/elasticsearch-certutil cert --silent --pem --in config/certificates/instances.yml -out /certs/bundle.zip;
          unzip /certs/bundle.zip -d /certs; 
        fi;
        chown -R 1000:0 /certs
      '
    working_dir: /usr/share/elasticsearch
    volumes: 
      - ${ROOT}\certs:/certs
      - .:/usr/share/elasticsearch/config/certificates
    networks:
      - elastic        

volumes: 
  certs:
    driver: local

networks:
  elastic:
    driver: bridge

docker-compose.yml (this file specifies for docker-compose the 4 Elasticsearch nodes + 1 Kibana):

version: '2.2'

services:
  es01:
    image: docker.elastic.co/elasticsearch/elasticsearch:${VERSION}
    container_name: es01
    environment:
      - node.name=es01
      - cluster.name=es-docker-cluster      
      - discovery.seed_hosts=es02,es03
      - cluster.initial_master_nodes=es01,es02
      - bootstrap.memory_lock=true
      - "ES_JAVA_OPTS=-Xms512m -Xmx512m"      
      - xpack.license.self_generated.type=trial # <1>
      - xpack.security.enabled=true      
      - xpack.security.http.ssl.enabled=true # <2>
      - xpack.security.http.ssl.key=$CERTS_DIR/es01/es01.key
      - xpack.security.http.ssl.certificate_authorities=$CERTS_DIR/ca/ca.crt
      - xpack.security.http.ssl.certificate=$CERTS_DIR/es01/es01.crt
      - xpack.security.transport.ssl.enabled=true # <3>
      - xpack.security.transport.ssl.verification_mode=certificate # <4>
      - xpack.security.transport.ssl.certificate_authorities=$CERTS_DIR/ca/ca.crt
      - xpack.security.transport.ssl.certificate=$CERTS_DIR/es01/es01.crt
      - xpack.security.transport.ssl.key=$CERTS_DIR/es01/es01.key
    ulimits:
      memlock:
        soft: -1
        hard: -1
    volumes: 
      - ${ROOT}\data\data01:/usr/share/elasticsearch/data
      - ${ROOT}\backups:/my_backup
      - ${ROOT}\config\elasticsearch.yml:/usr/share/elasticsearch/config/elasticsearch.yml
      - ${ROOT}\certs:$CERTS_DIR
    ports:
      - 9200:9200
    networks:
      - elastic
      
    healthcheck:
      test: curl --cacert $CERTS_DIR/ca/ca.crt -s https://localhost:9200 >/dev/null; if [[ $$? == 52 ]]; then echo 0; else echo 1; fi
      interval: 30s
      timeout: 10s
      retries: 5

  es02:
    image: docker.elastic.co/elasticsearch/elasticsearch:${VERSION}
    container_name: es02
    environment:
      - node.name=es02
      - cluster.name=es-docker-cluster
      - discovery.seed_hosts=es01,es03
      - cluster.initial_master_nodes=es01,es02
      - bootstrap.memory_lock=true
      - "ES_JAVA_OPTS=-Xms512m -Xmx512m"
      - xpack.license.self_generated.type=trial
      - xpack.security.enabled=true
      - xpack.security.http.ssl.enabled=true
      - xpack.security.http.ssl.key=$CERTS_DIR/es02/es02.key
      - xpack.security.http.ssl.certificate_authorities=$CERTS_DIR/ca/ca.crt
      - xpack.security.http.ssl.certificate=$CERTS_DIR/es02/es02.crt
      - xpack.security.transport.ssl.enabled=true
      - xpack.security.transport.ssl.verification_mode=certificate 
      - xpack.security.transport.ssl.certificate_authorities=$CERTS_DIR/ca/ca.crt
      - xpack.security.transport.ssl.certificate=$CERTS_DIR/es02/es02.crt
      - xpack.security.transport.ssl.key=$CERTS_DIR/es02/es02.key
      - node.roles=master,data
    ulimits:
      memlock:
        soft: -1
        hard: -1
    volumes:
      - ${ROOT}\data\data02:/usr/share/elasticsearch/data
      - ${ROOT}\backups:/my_backup
      - ${ROOT}\config\elasticsearch.yml:/usr/share/elasticsearch/config/elasticsearch.yml
      - ${ROOT}\certs:$CERTS_DIR
    networks:
      - elastic
      
  es03:
    image: docker.elastic.co/elasticsearch/elasticsearch:${VERSION}
    container_name: es03
    environment:
      - node.name=es03
      - cluster.name=es-docker-cluster
      - discovery.seed_hosts=es01,es02
      - cluster.initial_master_nodes=es01,es02
      - bootstrap.memory_lock=true
      - "ES_JAVA_OPTS=-Xms512m -Xmx512m"
      - xpack.license.self_generated.type=trial
      - xpack.security.enabled=true
      - xpack.security.http.ssl.enabled=true
      - xpack.security.http.ssl.key=$CERTS_DIR/es03/es03.key
      - xpack.security.http.ssl.certificate_authorities=$CERTS_DIR/ca/ca.crt
      - xpack.security.http.ssl.certificate=$CERTS_DIR/es03/es03.crt
      - xpack.security.transport.ssl.enabled=true
      - xpack.security.transport.ssl.verification_mode=certificate 
      - xpack.security.transport.ssl.certificate_authorities=$CERTS_DIR/ca/ca.crt
      - xpack.security.transport.ssl.certificate=$CERTS_DIR/es03/es03.crt
      - xpack.security.transport.ssl.key=$CERTS_DIR/es03/es03.key
      - node.roles=data
    ulimits:
      memlock:
        soft: -1
        hard: -1
    volumes: 
      - ${ROOT}\data\data03:/usr/share/elasticsearch/data
      - ${ROOT}\backups:/my_backup
      - ${ROOT}\config\elasticsearch.yml:/usr/share/elasticsearch/config/elasticsearch.yml
      - ${ROOT}\certs:$CERTS_DIR
    networks:
      - elastic

  es04:
    image: docker.elastic.co/elasticsearch/elasticsearch:${VERSION}
    container_name: es04
    environment:
      - node.name=es04
      - cluster.name=es-docker-cluster
      - discovery.seed_hosts=es01,es02
      - cluster.initial_master_nodes=es01,es02
      - bootstrap.memory_lock=true
      - "ES_JAVA_OPTS=-Xms512m -Xmx512m"
      - xpack.license.self_generated.type=trial
      - xpack.security.enabled=true
      - xpack.security.http.ssl.enabled=true
      - xpack.security.http.ssl.key=$CERTS_DIR/es04/es04.key
      - xpack.security.http.ssl.certificate_authorities=$CERTS_DIR/ca/ca.crt
      - xpack.security.http.ssl.certificate=$CERTS_DIR/es04/es04.crt
      - xpack.security.transport.ssl.enabled=true
      - xpack.security.transport.ssl.verification_mode=certificate 
      - xpack.security.transport.ssl.certificate_authorities=$CERTS_DIR/ca/ca.crt
      - xpack.security.transport.ssl.certificate=$CERTS_DIR/es04/es04.crt
      - xpack.security.transport.ssl.key=$CERTS_DIR/es04/es04.key
      - node.roles=data
    ulimits:
      memlock:
        soft: -1
        hard: -1
    volumes: 
      - ${ROOT}\data\data04:/usr/share/elasticsearch/data
      - ${ROOT}\backups:/my_backup
      - ${ROOT}\config\elasticsearch.yml:/usr/share/elasticsearch/config/elasticsearch.yml
      - ${ROOT}\certs:$CERTS_DIR
    networks:
      - elastic

  kib01:
    image: docker.elastic.co/kibana/kibana:${VERSION}
    container_name: kib01
    depends_on: {"es01": {"condition": "service_healthy"}}
    ports:
      - 5601:5601    
    environment:
      SERVERNAME: localhost
      ELASTICSEARCH_URL: https://es01:9200
      ELASTICSEARCH_HOSTS: '["https://es01:9200","https://es02:9200"]'
      ELASTICSEARCH_USERNAME: kibana_system
      ELASTICSEARCH_PASSWORD: myPassw0rd
      ELASTICSEARCH_SSL_CERTIFICATEAUTHORITIES: $CERTS_DIR/ca/ca.crt
      SERVER_SSL_ENABLED: "true"
      SERVER_SSL_KEY: $CERTS_DIR/kib01/kib01.key
      SERVER_SSL_CERTIFICATE: $CERTS_DIR/kib01/kib01.crt
    volumes: 
      - ${ROOT}\certs:$CERTS_DIR
      - ${ROOT}\config\kibana.yml:/usr/share/kibana/config/kibana.yml
    networks:
      - elastic    
volumes:
  data01:
    driver: local
  data02:
    driver: local
  data03:
    driver: local
  data04:
    driver: local
  certs:
    driver: local

networks: 
  elastic:
    driver: bridge

Please note the following in this file, highlighted above:

  1. es01 will be created as a general purpose node (e.g. master, data etc’) – no changes here.
  2. es02 will be created as a master and data node.
  3. es03 and es04 will be created as data only nodes.
  4. The Kibana node can be configured to work with multiple hosts.
  5. The Kibana node will require a password. If you prefer a manual password then you can already set it. If you prefer to have it auto-generated you will need to first run the command to generate it and then recreate the kibana node with the password.

Generating certificates:

docker-compose -f create-certs.yml run --rm create_certs

Running the cluster:

docker-compose up

To set passwords manually:

docker exec -it es01 bash

And from within the docker container execute the following commands and set the passwords. Make sure that either the kibana_system password matches what you have in the docker-compose.yml file, or that you change the password in that file to match the password you will be setting now.

bin/elasticsearch-setup-passwords interactive --url https://es01:9200

Restart:

docker-compose restart

Note: on my dev machine sometimes docker at this point crashes. After restarting, double-check the wsl vm.max_map_count as explained above.

After docker-compose has completed, you should be able to browse to https://localhost:5601/ (don’t forget the https). Allow your browser to access despite the certificate warning.

After logging-in to Kibana, go to Dev Tools and check the nodes:

GET /_cat/nodes

The nodes are displayed to the right with their different assigned roles.

Testing snapshots

After logging-in to Kibana, go to Dev Tools and copy-paste the code below. Run each command one after another. This sample will: create an index with a document, backup the index (snapshot), delete the index, and finally restore the index:

# create new index with a new document
PUT test/_doc/1
{
  "first_name": "john",
  "last_name": "doe"
}
 
# retrieve to see contents
GET test/_doc/1
 
# register a new filesystem repository
# (if this works well, you should see in your 'backups' folder a new subfolder)
PUT /_snapshot/my_fs_backup
{
  "type": "fs",
  "settings": {
    "location": "my_fs_backup_location",
    "compress": true
  }
}
 
# backup
# (if this works well, you should now have contents in the 'my_fs_backup_location' subfolder)
PUT /_snapshot/my_fs_backup/snapshot_1?wait_for_completion=true
{
  "indices": "test"
}
 
# delete index
DELETE test
 
# this should now fail with 'index_not_found_exception'
GET test/_doc/1
 
# restore
POST /_snapshot/my_fs_backup/snapshot_1/_restore?wait_for_completion=true
 
# this should now fetch the document
GET test/_doc/1

References:

 
Leave a comment

Posted by on 30/12/2020 in Software Development


Tags: ,

Elasticsearch single-node using docker, Kibana, with snapshots, config and basic security

A quick way to starting a single-node Elasticsearch + Kibana using docker, with security, snapshots and config. I find it extremely useful for development purposes on my dev machine.

Notes:

  1. The Elasticsearch documentation on its own is usually very good. However this post is designated to quickly put together several concepts.
  2. In this deployment there is no TLS. If you do want to proceed with TLS consult this ref: https://www.elastic.co/blog/getting-started-with-elasticsearch-security
  3. In this example there is basic security, which is now free in Elasticsearch. However you may choose to comment out the security settings and use anonymous.

In the next post: docker-compose to form an Elasticsearch cluster with multiple nodes (https://evolpin.wordpress.com/2020/12/30/elasticsearch-cluster-using-docker-compose-with-basic-security-and-snapshots/).

Intro about Elasticsearch

If you are already acquainted with Elasticsearch, feel free to skip this part.

A couple of words on Elasticsearch – I am relatively new to Elasticsearch, working with it for several months now. Coming from years of working with relational databases, the main reason for me to use Elasticsearch is performance. Relational databases with complex queries unfortunately fail when tables are huge. Joining two, three or more huge tables is very costly and requires various solutions, or rather workarounds, to bypass performance problems. I know that Elasticsearch may also run into performance problems in various scenarios but so far from my tests the results are quite amazing. It is also a legit question whether Elasticsearch should be used as a DB or merely an index to a [relational] DB. I have read in the past various opinions going one way or another – but this is ‘off topic’ to this post. I will perhaps only mention that it is probably recommended to have a way to rebuild your Elasticsearch index should it ever come to that: either from backups or some other source for the data.

To read about Elasticsearch:

Setup

Consider creating a top-level parent folder, which will contain subfolders for backups, config and data. On my dev machine this looks like this:

  • F:\Projects\Elasticsearch\docker
    • backups
    • config
      • elasticsearch.yml
      • kibana.yml
    • data

Elasticsearch

  1. Within the config folder, create elasticsearch.yml file with the following configuration:
cluster.name: "docker-cluster"
network.host: 0.0.0.0
xpack.security.enabled: true #security; comment out if you want to run as an anonymous account
path:
  repo:
    - "/my_backup"

Note that if you would like to avoid security and run as anonymous, comment out “xpack.security.enabled: true”.

  1. Execute the command below, substituting “F:\Projects\Elasticsearch\docker” with your parent folder as required:
docker run --name elasticsearch -v F:\Projects\Elasticsearch\docker\config\elasticsearch.yml:/usr/share/elasticsearch/config/elasticsearch.yml -v F:\Projects\Elasticsearch\docker\data:/usr/share/elasticsearch/data -v F:\Projects\Elasticsearch\docker\backups:/my_backup -p 9200:9200 -p 9300:9300 -e "discovery.type=single-node" docker.elastic.co/elasticsearch/elasticsearch:7.10.1

This will create a single-node elasticsearch deployment on your local docker.

Note: “discovery.type=single-node” means that the created deployment will not attempt to join a cluster and will elect itself as master and bypass bootstrap checks (read here: https://www.elastic.co/guide/en/elasticsearch/reference/current/bootstrap-checks.html)

  1. If you did not comment out the security flag, you need to run a one-time password setup. To do this interactively perform the following steps:
docker exec -it elasticsearch bash

And from within the docker container execute the following to manually setup passwords:

bin/elasticsearch-setup-passwords interactive
  1. Not mandatory, but you can browse to http://localhost:9200, use ‘elastic’ with your password and it should look something like this:
{
  "name" : "3b082c05d2f5",
  "cluster_name" : "docker-cluster",
  "cluster_uuid" : "8iZmDn3ESbKUGNXNbIGyJw",
  "version" : {
    "number" : "7.10.1",
    "build_flavor" : "default",
    "build_type" : "docker",
    "build_hash" : "1c34507e66d7db1211f66f3513706fdf548736aa",
    "build_date" : "2020-12-05T01:00:33.671820Z",
    "build_snapshot" : false,
    "lucene_version" : "8.7.0",
    "minimum_wire_compatibility_version" : "6.8.0",
    "minimum_index_compatibility_version" : "6.0.0-beta1"
  },
  "tagline" : "You Know, for Search"
}

Kibana

  1. Create kibana.yml file with the following configuration:
server.name: "kibana"
server.host: "0.0.0.0"
elasticsearch.hosts: ["http://elasticsearch:9200"]

#security; comment out if you want to run as an anonymous account
elasticsearch.username: "kibana_system"
elasticsearch.password: "myPassw0rd"
xpack.security.encryptionKey: "something_at_least_32_characters"

Note the “elasticsearch.password”. You will need to change this according to the password that you have selected earlier.

If you decided to avoid security in the first place and use anonymous, simply comment out the “elasticsearch.username”, “elasticsearch.password” and “xpack.security.encryptionKey”.

To read the about Kibana security configuration: https://www.elastic.co/guide/en/kibana/current/using-kibana-with-security.html

  1. Execute the command below, substituting “F:\Projects\Elasticsearch\docker” with your parent folder as required:
docker run --name kibana --link elasticsearch -v F:\Projects\Elasticsearch\docker\config\kibana.yml:/usr/share/kibana/config/kibana.yml -p 5601:5601 docker.elastic.co/kibana/kibana:7.10.1
  1. Startup Kibana using http://localhost:5601 and login using ‘elastic’ and your selected password.

Testing snapshots

After logging-in to Kibana, go to Dev Tools and copy-paste the code below. Run each command one after another. This sample will: create an index with a document, backup the index (snapshot), delete the index, and finally restore the index:

# create new index with a new document
PUT test/_doc/1
{
  "first_name": "john",
  "last_name": "doe"
}

# retrieve to see contents
GET test/_doc/1

# register a new filesystem repository
# (if this works well, you should see in your 'backups' folder a new subfolder)
PUT /_snapshot/my_fs_backup
{
  "type": "fs",
  "settings": {
    "location": "my_fs_backup_location",
    "compress": true
  }
}

# backup
# (if this works well, you should now have contents in the 'my_fs_backup_location' subfolder)
PUT /_snapshot/my_fs_backup/snapshot_1?wait_for_completion=true
{
  "indices": "test"
}

# delete index
DELETE test

# this should now fail with 'index_not_found_exception'
GET test/_doc/1

# restore
POST /_snapshot/my_fs_backup/snapshot_1/_restore

# this should now fetch the document
GET test/_doc/1

References:

 
Leave a comment

Posted by on 29/12/2020 in Software Development


Tags: ,

Posting JavaScript types to MVC 6 in .NET core, using Ajax

This is an update to several posts I did years ago, mainly: https://evolpin.wordpress.com/2012/07/22/posting-complex-types-to-mvc. If you are interested in the source code then download it from here.

In this post are included several methods to post data to .NET core 2.2 MVC controller. The example uses the default MVC template that comes with bootstrap, jQuery validate and unobtrusive scripts.

If you rather just visit a possible custom model binding solution to send multiple objects in a POST JSON request, click here.

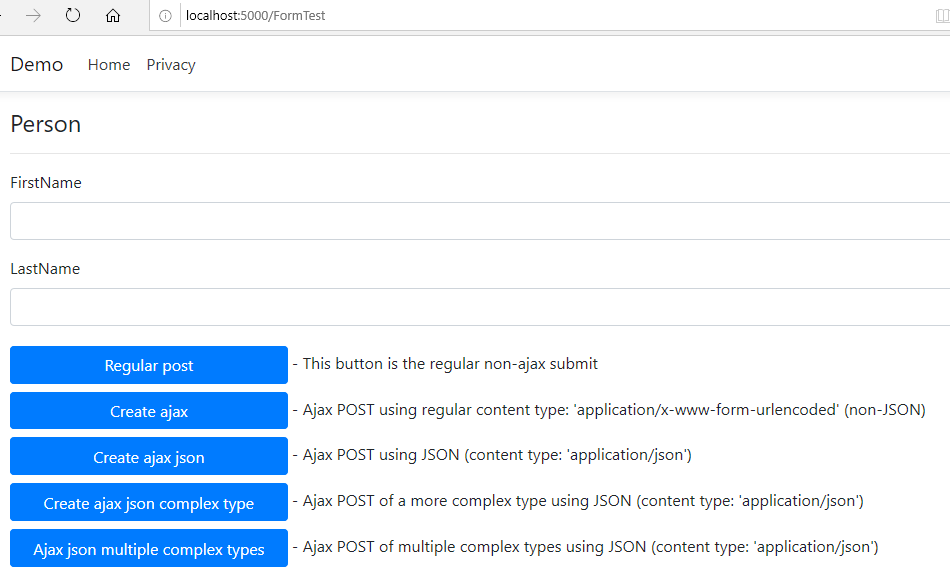
The test form is quite simple: a scaffolded Person form with several test buttons.

Note the Scripts section beneath the html. It provides the unobtrusive and validate jQuery code. You don’t have to use it and you may very well use whatever validation you prefer. I just preferred to use it as it comes out-of-the-box with the Visual Studio MVC template.

The ViewModel I used for this example is that of a Person:

    public class Person
    {
        [Required]
        public string FirstName { get; set; }
        public string LastName { get; set; }
    }

One more code change that I introduced into my Startup.cs, is to use the DefaultContractResolver. This will override the, well…, default behavior in MVC 6 that returns camel cased JSON (e.f. firstName instead of FirstName). I prefer the original casing.

        public void ConfigureServices(IServiceCollection services)
        {
            services.Configure<CookiePolicyOptions>(options =>
            {
                // This lambda determines whether user consent for non-essential cookies is needed for a given request.
                options.CheckConsentNeeded = context => true;
                options.MinimumSameSitePolicy = SameSiteMode.None;
            });

            services.AddMvc().SetCompatibilityVersion(CompatibilityVersion.Version_2_2)
                .AddJsonOptions(f => f.SerializerSettings.ContractResolver = new DefaultContractResolver());
        }

‘Regular post’ button

The first button is a regular post of the form data. This being a submit button, it’ll auto activate validation.

You can use either this controller code, which receives the IFormCollection (including any form items such as the AntiForgery token).

        [HttpPost]
        [ValidateAntiForgeryToken]
        public ActionResult Create(IFormCollection collection)
        {
            try
            {
                if (!ModelState.IsValid)
                    throw new Exception($"not valid");

                foreach (var item in collection)
                {
                    _logger.LogInformation($"{item.Key}={item.Value}");
                }

                return RedirectToAction(nameof(Index));
            }
            catch
            {
                return View();
            }
        }

Alternatively you can use this code which focuses on binding the posted form variables to the Person C# object:

        [HttpPost]
        [ValidateAntiForgeryToken]
        public ActionResult Create(Person person)
        {
            try
            {
                if (!ModelState.IsValid)
                    throw new Exception($"not valid");

                _logger.LogInformation($"{nameof(person.FirstName)}={person.FirstName}");
                _logger.LogInformation($"{nameof(person.LastName)}={person.LastName}");

                return RedirectToAction(nameof(Index));
            }
            catch
            {
                return View();
            }
        }

Enough of this, where’s the Ajax?

The ‘Create ajax’ button uses the following jQuery to post. Note the ‘beforeSend’ which adds the Anti Forgery token. You must specify this or the request will fail due to the controller code [ValidateAntiForgeryToken] attribute that validates it.

            // Ajax POST using regular content type: 'application/x-www-form-urlencoded'
            $('#btnFormAjax').on('click', function () {

                if (myForm.valid()) {
                    var first = $('#FirstName').val();
                    var last = $('#LastName').val();
                    var data = { FirstName: first, LastName: last };

                    $.ajax({
                        url: '@Url.Action("CreateAjaxForm")',
                        type: 'POST',
                        beforeSend: function (xhr) {
                            xhr.setRequestHeader("RequestVerificationToken",
                                $('input:hidden[name="__RequestVerificationToken"]').val());
                        },
                        data: data
                    }).done(function (result) {
                        alert(result.FullName);
                    });
                }

            });

The controller code is quite the same (I omitted the try-catch for abbreviation purposes). Note, that the returned result in this example is JSON but it doesn’t have to be.

        // Ajax POST using regular content type: 'application/x-www-form-urlencoded' (non-JSON)
        [HttpPost]
        [ValidateAntiForgeryToken]
        public ActionResult CreateAjaxForm(Person person)
        {
            if (!ModelState.IsValid)
                throw new Exception($"not valid");

            _logger.LogInformation($"{nameof(person.FirstName)}={person.FirstName}");
            _logger.LogInformation($"{nameof(person.LastName)}={person.LastName}");

            return Json(new { FullName = $"{person.FirstName} {person.LastName}" });
        }

This is the Ajax request:

OK, but I want to POST JSON and not application/x-www-form-urlencoded

I prefer to post and receive JSON. It is more consistent and will allow me more flexibility to use more complex objects as will be shown later on.

The default ‘contentType’ for $.ajax is ‘application/x-www-form-urlencoded; charset=UTF-8‘ so we did not have to specify it earlier. To send JSON we now specify a content type of ‘application/json; charset=utf-8‘.

The ‘data’ is now converted to JSON using JSON.stringify() common browser method.

The ‘dataType’ indicates expecting a JSON as the return object.

            $('#btnFormAjaxJson').on('click', function () {

                if (myForm.valid()) {
                    var first = $('#FirstName').val();
                    var last = $('#LastName').val();
                    var data = { FirstName: first, LastName: last };

                    $.ajax({
                        url: '@Url.Action("CreateAjaxFormJson")',
                        type: 'POST',
                        beforeSend: function (xhr) {
                            xhr.setRequestHeader("RequestVerificationToken",
                                $('input:hidden[name="__RequestVerificationToken"]').val());
                        },
                        dataType: 'json',
                        contentType: 'application/json; charset=utf-8',
                        data: JSON.stringify(data)
                    }).done(function (result) {
                        alert(result.FullName)
                    });
                }

            });

The controller code has one small but important change: The [FromBody] attribute of the Person argument. Without this, person will not be populated with the values from the request payload and we will waste a lot of time understanding why.

        // Ajax POST using JSON (content type: 'application/json')
        [HttpPost]
        [ValidateAntiForgeryToken]
        public ActionResult CreateAjaxFormJson([FromBody] Person person)
        {
            if (!ModelState.IsValid)
                throw new Exception($"not valid");

            _logger.LogInformation($"{nameof(person.FirstName)}={person.FirstName}");
            _logger.LogInformation($"{nameof(person.LastName)}={person.LastName}");

            return Json(new { FullName = $"{person.FirstName} {person.LastName}" });
        }

This time, the request looks like this:

But what if I want to POST more data?

This is where it gets tricky. Unlike the good old WebMethod/PageMethods which allowed you to post and receive multiple JSON and complex data transparently, unfortunately, in MVC controllers this can’t be done and you can have only a single [FromBody] parameter (why??) as you can read here: https://docs.microsoft.com/en-us/aspnet/web-api/overview/formats-and-model-binding/parameter-binding-in-aspnet-web-api#using-frombody.

So, if you want to send a more complex type, that includes for example arrays or multiple objects, you need to receive them as a single argument. The ‘Create ajax json complex type’ button demonstrates this. The View Model used here is:

    public class Person
    {
        [Required]
        public string FirstName { get; set; }
        public string LastName { get; set; }
    }

    public class People
    {
        public Person[] SeveralPeople { get; set; }
    }

In the sending Javascript, it is very important to note the identically structured ‘people’ object as highlighted below:

             // form ajax with json complex type
            $('#btnFormAjaxJsonComplexType').on('click', function () {

                var joe = { FirstName: 'Joe' };
                var jane = { FirstName: 'Jane' };
                var people = { SeveralPeople: [joe, jane] };

                $.ajax({
                    url: '@Url.Action("CreateAjaxFormJsonComplexType")',
                    type: 'POST',
                    beforeSend: function (xhr) {
                        xhr.setRequestHeader("RequestVerificationToken",
                            $('input:hidden[name="__RequestVerificationToken"]').val());
                    },
                    dataType: 'json',
                    contentType: 'application/json; charset=utf-8',
                    data: JSON.stringify(people)
                }).done(function (result) {
                    alert(result.Count)
                });

            });

The controller code receives a single object:

        // Ajax POST of a more complex type using JSON (content type: 'application/json')
        [HttpPost]
        [ValidateAntiForgeryToken]
        public ActionResult CreateAjaxFormJsonComplexType([FromBody] People people)
        {
            if (!ModelState.IsValid)
                throw new Exception($"not valid");

            foreach (var person in people.SeveralPeople)
            {
                _logger.LogInformation($"{nameof(person.FirstName)}={person.FirstName}");
            }

            return Json(new { Count = people.SeveralPeople.Count() });
        }

And the request:

A step back

While ‘people’ might make sense to send as one array object, what happens if you want to send multiple objects which are less related? Again, in past WebMethods this was trivial and transparent. Here, you are required to send them as a single object. For some reason, Microsoft decided to take a step back from a well working and decent WebMethods that exists for years.

Consider the Javascript below. It looks very much alike the previous example, but this time the ‘data’ is not related to the People class in our server side. Instead, it simply binds two objects together to be sent over as JSON.

Please note that I named the parameters ‘one’ and ‘two’. This will be important for the server side binding.

             // form ajax with multiple json complex types
            $('#btnFormAjaxJsonMultipleComplexTypes').on('click', function () {

                var joe = { FirstName: 'Joe' };
                var jane = { FirstName: 'Jane' };
                var data = { one: joe, two: jane };

                $.ajax({
                    url: '@Url.Action("CreateAjaxFormJsonMultipleComplexType")',
                    type: 'POST',
                    beforeSend: function (xhr) {
                        xhr.setRequestHeader("RequestVerificationToken",
                            $('input:hidden[name="__RequestVerificationToken"]').val());
                    },
                    dataType: 'json',
                    contentType: 'application/json; charset=utf-8',
                    data: JSON.stringify(data)
                }).done(function (result) {
                    alert(result.Count)
                });

            });

The server side controller that we would like to have has two parameters (‘one and ‘two’ as send from the client Javascript), but explained earlier, the default model binder in MVC today does not support it and it would not work.

        // this would FAIL and not work
        [HttpPost]
        [ValidateAntiForgeryToken]
        public ActionResult CreateAjaxFormJsonMultipleComplexType([FromBody] Person one, [FromBody] Person two)
        {
            if (!ModelState.IsValid)
                throw new Exception($"not valid");

            var people = new[] { one, two };
            foreach (var person in people)
            {
                _logger.LogInformation($"{nameof(person.FirstName)}={person.FirstName}");
            }

            return Json(new { Count = people.Length });
        }

I was looking for a way this can be done. Fortunately it seems that we can tailor our own model binder, meaning that we can implement a custom class to bind the request body to our parameters. Here are a couple of references that helped me out:

https://docs.microsoft.com/en-us/aspnet/core/mvc/advanced/custom-model-binding?view=aspnetcore-2.2

https://www.c-sharpcorner.com/article/custom-model-binding-in-asp-net-core-mvc/

Writing a custom binder seems easy enough (although I reckon there is much to learn). You need to code a ‘binding provider’. This gets called once per parameter.

    public class CustomModelBinderProvider : IModelBinderProvider
    {
        public IModelBinder GetBinder(ModelBinderProviderContext context)
        {
            if (/* some condition to decide whether we invoke the custom binder or not */)
                return new CustomModelBinder();

            return null;
        }
    }

The CustomModelBinder needs to do some work parsing content and create an object. That object will be passed to your controller method. This method will also be called once per parameter.

    public class CustomModelBinder : IModelBinder
    {
        public Task BindModelAsync(ModelBindingContext bindingContext)
        {
            var obj =/* some code to populate the parameter that will be passed to your controller method */

            bindingContext.Result = ModelBindingResult.Success(obj);

            return Task.CompletedTask;
        }
    }

You need to modify the ConfigureServices in your Startup class to use this binder.

            services.AddMvc(
                config => config.ModelBinderProviders.Insert(0, new CustomModelBinderProvider()))
                .SetCompatibilityVersion(CompatibilityVersion.Version_2_2)
                .AddJsonOptions(f => f.SerializerSettings.ContractResolver = new DefaultContractResolver());

In my case I wanted to populate not a specific model type (as can be seen in the 2 links above), but something that will populate any parameter type. In other words, I wanted something like the [FromBody] that will work with multiple parameters. So I named it [FromBody2]… I even placed a Required option so if a parameter is missing from the request, it may trigger an exception if set.

    [AttributeUsage(AttributeTargets.Property | AttributeTargets.Parameter, AllowMultiple = false, Inherited = true)]
    public class FromBody2 : Attribute
    {
        public bool Required { get; set; } = false;
    }

Note: originally I did not use [FromBody2], and the custom binder worked for ALL parameters. But then I thought it might be better to have some sort of attribute to gain better control, as input arguments in various requests might be different than what we expect.

My binder provider class is checking whether the parameter has the [FromBody2] parameter. If found, it will also pass it to the custom binder so it can be used internally.

    public class CustomModelBinderProvider : IModelBinderProvider
    {
        public IModelBinder GetBinder(ModelBinderProviderContext context)
        {
            var metaData = context.Metadata as Microsoft.AspNetCore.Mvc.ModelBinding.Metadata.DefaultModelMetadata;
            var attr = metaData?.Attributes?.Attributes?.FirstOrDefault(a => a.GetType() == typeof(FromBody2));
            if (attr != null)
                return new CustomModelBinder((FromBody2)attr);

            return null;
        }
    }

Now the binder itself. This was a bit tricky to write because I am consuming the request body stream, which can be done just once, whereas the custom binder is called once per parameter. Therefore I read the stream once and store it in the HttpContext.Items bag for other parameters. I reckon that there could be much more elegant solutions, but this will do for now. Explanation follows the example.

    public class CustomModelBinder : IModelBinder
    {
        private FromBody2 _attr;
        public CustomModelBinder(FromBody2 attr)
        {
            this._attr = attr;
        }

        public Task BindModelAsync(ModelBindingContext bindingContext)
        {
            if (bindingContext == null)
                throw new ArgumentNullException(nameof(bindingContext));

            var httpContext = bindingContext.HttpContext;
            var body = httpContext.Items["body"] as Dictionary<string, object>;

            // read the request stream once and store it for other items
            if (body == null)
            {
                string json;
                using (StreamReader sr = new StreamReader(httpContext.Request.Body))
                {
                    json = sr.ReadToEnd();

                    body = JsonConvert.DeserializeObject<Dictionary<string, object>>(json);
                    httpContext.Items["body"] = body;
                }
            }

            // attempt to find the parameter in the body stream
            if (body.TryGetValue(bindingContext.FieldName, out object obj))
            {
                JObject jsonObj = obj as JObject;

                if (jsonObj != null)
                {
                    obj = jsonObj.ToObject(bindingContext.ModelType);
                }
                else
                {
                    obj = Convert.ChangeType(obj, bindingContext.ModelType);
                }

                // set as result
                bindingContext.Result = ModelBindingResult.Success(obj);
            }
            else
            {
                if (this._attr.Required)
                {
                    // throw an informative exception notifying a missing field
                    throw new ArgumentNullException($"Missing field: '{bindingContext.FieldName}'");
                }
            }

            return Task.CompletedTask;
        }
    }

Explanation:

  • Line 6: Stores the [FromBody2] instance of the parameter. This will be used later to check on the Required property if the request is missing the expected parameter data.
  • Line 14: Get the HttpContext.
  • Line 15: Check whether we have already cached the body payload.
  • Lines 18-28: A one time (per http request) read of the body payload. It will be deserialized to a Dictionary<string, object> and stored in the HttpContext for later parameters to use. Consider adding further validation code here, maybe checking on the ContentType etc.
  • Line 31: This is the nice part. The ModelBinder is given the name of the parameter. As a reminder, our desired method signature had a couple of arguments: Person ‘one’ and Person ‘two’. So the FieldName would be ‘one’ and in a second invocation ‘two’. This is very useful because we can extract it from the Dictionary.
  • Lines 33-35: We attempt to cast the object to JObject (JSON complex types). If we are successful, we further convert it to the actual parameter type.
  • Lines 39-42: If the object is a primitive non-JObject, we simply cast it according to the expected type. You may consider further validations here or just let it fail if the casting fails.
  • Line 45: We take the final object and pass it as a ‘successful result’. This would be handed over to our controller method.
  • Lines 49-53: If the request payload did not contain the expected parameter name, we may decide to throw an exception if it is marked as Required.

Finally, the controller code looks almost identical to the [failed] example somewhere above. Only this time, the parameters are decorated with [FromBody2]. As a reminder, we did not have to use [FromBody2] at all. This was only in order to gain more control over the binding process and avoid future situations in which this solution might not be suitable.

        // Ajax POST of multiple complex type using JSON (content type: 'application/json')
        [HttpPost]
        [ValidateAntiForgeryToken]
        public ActionResult CreateAjaxFormJsonMultipleComplexType([FromBody2] Person one, [FromBody2] Person two)
        {
            if (!ModelState.IsValid)
                throw new Exception($"not valid");

            var people = new[] { one, two };
            foreach (var person in people)
            {
                _logger.LogInformation($"{nameof(person.FirstName)}={person.FirstName}");
            }

            return Json(new { Count = people.Length });
        }

This looks like this:

We can even add more parameters e.g. a Required ‘three’. The current calling Javascript does not pass ‘three’ so an informative exception will be raised, specifying that ‘three’ is missing.

        // Ajax POST of multiple complex type using JSON (content type: 'application/json')
        [HttpPost]
        [ValidateAntiForgeryToken]
        public ActionResult CreateAjaxFormJsonMultipleComplexType([FromBody2] Person one,
[FromBody2] Person two,
[FromBody2(Required = true)] Person three)
        {
            if (!ModelState.IsValid)
                throw new Exception($"not valid");

            var people = new[] { one, two };
            foreach (var person in people)
            {
                _logger.LogInformation($"{nameof(person.FirstName)}={person.FirstName}");
            }

            return Json(new { Count = people.Length });
        }

Summary: it is really nice to have complete control over everything, but in the end I would expect Microsoft to fix this and provide an out of the box implementation for receiving multiple JSON objects as multiple parameters.

 
2 Comments

Posted by on 09/02/2019 in Software Development


Tags: , , ,

How to hide WebMethods unhandled exception stacktrace using Response.Filter

If you’re interested in the code shown in this post, right-click here, click Save As and rename to zip.

Here’s a nice trick how to manipulate outgoing ASP.NET Response. Specifically, in situations that you would like to provide global handling of errors, removing the stacktrace.

In case you are wondering why you would remove the stacktrace – it is considered a security issue for attackers to be able to review the stacktrace (https://www.owasp.org/index.php/Missing_Error_Handling).

Consider this code, a web method raising an exception.

[WebMethod]
public static void RaiseException()
{
	throw new ApplicationException("test");
}

And the page code:

<asp:ScriptManager runat="server" EnablePageMethods="true" />
<input type="button" value="Go" id="btn" />
<script>
	window.onload = function () {
		var btn = document.getElementById('btn');
		btn.onclick = function () {
			PageMethods.RaiseException(function () { }, function (error) {
				alert(error.get_stackTrace());
			});
		}
	}
</script>

Running this code as is and clicking the button would result with a JSON response that includes the error message, exception type and stacktrace:

exception1

To remove the stacktrace it is possible to use ASP.NET’s Response.Filter. The Filter property is actually a Stream that allows us to override the default stream behavior. In this particular case the custom stream is simply a wrapper. All the stream methods except the method Write() will simply invoke the original stream’s methods.

public class ExceptionFilterStream : Stream
{
    private Stream stream;
    private HttpResponse response;
    public ExceptionFilterStream(HttpResponse response)
    {
        this.response = response;
        this.stream = this.response.Filter;
    }

    public override bool CanRead { get { return this.stream.CanRead; } }
    public override bool CanSeek { get { return this.stream.CanSeek; } }
    public override bool CanWrite { get { return this.stream.CanWrite; } }
    public override long Length { get { return this.stream.Length; } }
    public override long Position { get { return this.stream.Position; } set { this.stream.Position = value; } }
    public override void Flush() { this.stream.Flush(); }
    public override int Read(byte[] buffer, int offset, int count) { return this.stream.Read(buffer, offset, count); }
    public override long Seek(long offset, SeekOrigin origin) { return this.stream.Seek(offset, origin); }
    public override void SetLength(long value) { this.stream.SetLength(value); }

    public override void Write(byte[] buffer, int offset, int count)
    {
        if (this.response.StatusCode == 500 && this.response.ContentType.StartsWith("application/json"))
        {
            string response = System.Text.Encoding.UTF8.GetString(buffer);

            var serializer = new JavaScriptSerializer();
            var map = serializer.Deserialize<Dictionary<string, object>>(response);
            if (map != null && map.ContainsKey("StackTrace"))
            {
                map["StackTrace"] = "Forbidden";

                response = serializer.Serialize(map);
                buffer = System.Text.Encoding.UTF8.GetBytes(response);
                this.stream.Write(buffer, 0, buffer.Length);

                return;
            }
        }

        this.stream.Write(buffer, offset, count);
    }
}

Note that all the methods simply call the original stream’s methods. Points of interest:

  • Line 8: Apparently if you don’t call the original Filter property “on time” you will run into an HttpException: “Exception Details: System.Web.HttpException: Response filter is not valid”.
  • Line 23: From this point on the customization of the Write() is up to you. As can be seen, I selected to intercept error codes of 500 (“internal server errors”) where the response are application/json. The code simply reads the text, deserializes it and if the key “StackTrace” appears, replace its value with the word “Forbidden”. Note that there’s a return statement following this replacement so the code does not proceed to line 41. In all other cases, the original stream’s Write() kicks-in (Line 41).

Finally, we need to actually use the custom Stream. I used Application_BeginRequest in Global.asax like so:

<script runat="server">

    protected void Application_BeginRequest(Object sender, EventArgs e)
    {
        Response.Filter = new ExceptionFilterStream(Response);
    }

</script>

The result:
exception2

Obviously you can use this technique to manipulate outgoing responses for totally different scenarios.

 
Leave a comment

Posted by on 29/11/2015 in Software Development


Tags: , , ,

ASP.NET 5, DNX, stepping into MS source code

One feature which I find awesome in ASP.NET 5/vNext is the ability to download MS source code and debug it locally (I discussed this here under the global.json section). This was discussed in several sessions with Scott Hanselman and demonstrated well with Damian Edwards (Deep Dive into ASP.NET 5 – approx minute 16:20 into the session). I find this feature great because there have been countless times that I tried to understand why .NET was behaving the way it does. Despite .NET source code being available for download and debug sometimes, it was hectic getting it to work and eventually I used reflection tools to read .NET assemblies and trying to understand why things are working (or not). So being able to simply download the code and using it locally sounds great.

However despite the session with Damien I still had problems getting it to work and Damian was kind enough to assist me where I had trouble. I assume that MS will make it easier in the future. On stage Scott and Damian discussed having a context menu option to “switch to source code”. Indeed it could be great, especially if that will also download the correct version of the source code – because that is mainly what was giving me trouble.

So here is a walk through (I used VS2015 RC):

  1. Create an ASP.NET 5 app using the template website.1
  2. Run it (F5), just in case to see that it works and that if you encounter errors in the process, they are not related to something else which is faulty.
  3. Download the correct tag of MVC from Github. Note: this is what fooled me. I initially downloaded the ongoing “dev” tag when I should have actually downloaded “6.0.0-beta4”. As you can see, you can tell the correct tag as it is specified in the Solution Explorer: 2Follow the steps in the image below:3
  4. Once downloaded and extracted, edit global.json in your solution and add the local path to the “projects” element. Note that the slashes have to be forward slashes. As soon as you click save you will witness the Solution Explorer going berserk as VS automatically loads the local source code. More importantly, you can see that the icon in VS for MVC has changed to that of local files.4
  5. Basically that’s it. You can now re-run the code and step through. Taking Damian’s example from Build 2015, I inserted the new <cache> tag and placed a breakpoint within the CacheTagHelper class.5

Once again, thanks Damian.

 
Leave a comment

Posted by on 31/05/2015 in Software Development


Tags: , ,

vNext and Class Libraries

This is a followup to the previous post discussing my first steps with vNext. I suggest reading it first.

vNext class libraries are similar in concept to a regular .NET library. Like ASP.NET vNext they do not actually build to a dll. What is great about them is that you can basically change the vNext library using notepad and it will be compiled on-the-fly when you re-run the page. However unfortunately code changes done in vNext, including vNext libraries, will require a restart of the host process in order to take effect. It would have been great if code changes did not require this restart and the state of the app would be maintained.

The good news is that you can reference regular .NET class libraries from vNext. This may sound trivial, but up until the recent beta 2 and VS2015 CTP 5 it wasn’t possible unless you pulled a github update and manually “k wrapped” your .NET assembly with a vNext library as explained here. Fortunately CTP 5 allows referencing a regular .NET library but it is still buggy as VS might raise build errors (as it does on my machine), but the reference will actually work and running code from a vNext MVC site actually invokes the compiled .NET dll.

Here’s how:

1. I create and open a new ASP.NET vNext web application. This time I’m using an Empty project and adding the bear minimum of code required to run an MVC app.
class lib1

project.json: Add a dependency to “Microsoft.AspNet.Mvc”.

{
    "webroot": "wwwroot",
    "version": "1.0.0-*",
    "exclude": [
        "wwwroot"
    ],
    "packExclude": [
        "node_modules",
        "bower_components",
        "**.kproj",
        "**.user",
        "**.vspscc"
    ],
    "dependencies": {
		"Microsoft.AspNet.Server.IIS": "1.0.0-beta2",
		"Microsoft.AspNet.Mvc": "6.0.0-beta2"
    },
    "frameworks" : {
        "aspnet50" : { },
        "aspnetcore50" : { }
    }
}

Startup.cs: Add configuration code and a basic HomeController like so:

using Microsoft.AspNet.Builder;
using Microsoft.Framework.DependencyInjection;

namespace WebApplication3
{
    public class Startup
    {
        public void ConfigureServices(IServiceCollection services)
        {
            services.AddMvc();
        }

        public void Configure(IApplicationBuilder app)
        {
            app.UseMvc();
        }
    }

    public class HomeController
    {
        public string Index()
        {
            return "hello";
        }
    }
}

Running the code now “as is” should show a “hello” string in the web browser.

2. I am adding a vNext class library (this isn’t mandatory for running a .NET lib but I do it anyway for the sake of the demo).
class lib2

The class lib has a single class like so:

namespace ClassLibrary1
{
    public class vNextLib
    {
        public static string GetString()
        {
            return "hello from vNext lib";
        }
    }
}

It is now possible to “add reference” to this new ClassLibrary1 as usual or simple modify the project.json like so (partial source listed below):

	"dependencies": {
		"Microsoft.AspNet.Server.IIS": "1.0.0-beta2",
		"Microsoft.AspNet.Mvc": "6.0.0-beta2",
		"ClassLibrary1": ""
	},

Finally change the calling ASP.NET vNext web app to call the library and display the string (Startup.cs change):

    public class HomeController
    {
        public string Index()
        {
            return ClassLibrary1.vNextLib.GetString();
        }
    }

At this point I recommend to “Start without debugging” (Ctrl F5). If you don’t do that, any code changes will stop IISExpress and you’ll have to F5 again from VS. You can do that but it will not be easy to take advantage of the “on the fly” compilation.

Note the process ID in iisexpress. 2508.
class lib3

Now changing the ClassLibrary1 code to say “hello from vNext lib 2” and saving causes iisexpress to restart (note the different Process ID). A simple browser refresh shows the result of the change – no build to the Class Library was required:
class lib4

3. Now create a new Class Library, but this time not a vNext library but a regular .NET library.
class lib5

The code I use is very similar:

namespace ClassLibrary2
{
    public class RegLib
    {
        public static string GetString()
        {
            return "hello from .NET lib";
        }
    }
}

This time you can’t just go to project.json directly as before because the .NET library isn’t a “dependency” as the vNext library. You must first add a reference the “old fashion way” (VS 2015 – CTP 5, remember?):
class lib6

This automates several things:

  • It “wraps” the .NET dll with a vNext lib wrapper which can be viewed in a “src” sibling “wrap” folder. It actually performs what was previously “k wrap” from that github pull mentioned earlier:
    class lib7
  • It adds the “wrap” folder to the “sources” entry in the global.json. If you recall from the previous post, global.json references source folders for the vNext solution so this is a clever way to include references to the class lib:
    {
      "sources": [
        "src",
        "test",
        "wrap"
      ]
    }
    

Now that you have a “ghost vNext lib” wrapping the real .NET code. This isn’t enough. You need to add a dependency to the project.json just like with a regular vNext lib (you may have to build your .NET DLL first before the ClassLibrary2 is available):

	"dependencies": {
		"Microsoft.AspNet.Server.IIS": "1.0.0-beta2",
		"Microsoft.AspNet.Mvc": "6.0.0-beta2",
		"ClassLibrary1": "",
		"ClassLibrary2": ""
	},

Now changing the Startup.cs code:

    public class HomeController
    {
        public string Index()
        {
            //return ClassLibrary1.vNextLib.GetString();
            return ClassLibrary2.RegLib.GetString();
        }
    }

Now it seems like in VS2015 CTP 5 this is buggy because building results with an error that complains of a missing ClassLibrary2:

Error CS0103 The name ‘ClassLibrary2’ does not exist in the current context.

If you ignore the build error and still run using ctrl+F5 – it will work:
class lib9

Changing the regular .NET code and saving has no effect as expected, until you recompile it.

Why referencing a regular .NET lib so important? I can think of several reasons:

  1. Migrating a .NET web app to vNext. You may want to use vNext for the ASP.NET tier and use your older business logic and data layers regular .NET assemblies until you decide to migrate them.
  2. Security: If you deploy a vNext app which is not precompiled, a hacker might change your code and vNext will compile on-the-fly. You may claim that you should not deploy non-precompiled apps, but I think differently. I see it as a great advantage to be able to make changes on a server using notepad, in order to perform a quick fix or debug an issue. The downside is the potential hacking. Not sure if MS will allow a single vNext class lib to be precompiled while the rest of the site to be deployed with its source code. If not, perhaps the solution is to use a pre-compiled regular .NET class library for sensitive code, deployed with a non-precompiled vNext app.
  3. Referencing a 3rd party .NET library which does not have a vNext package might be useful.


Summary

I assume that Microsoft will spend more time making this wrapping mechanism transparent and flawless. Basically I see no reason why adding the dependency to the wrapping vNext lib isn’t a part of adding a reference to a .NET lib.

A good reference to vNext Class Libraries can be found in the video session of Scott Hanselman and David Fowler: http://channel9.msdn.com/Events/TechEd/NorthAmerica/2014/DEV-B411.

 
1 Comment

Posted by on 25/01/2015 in Software Development


Tags: , ,

First steps with ASP.NET vNext

This is a big topic. I have had trouble writing about this because it is so big. So I decided to split it into several blog posts. This first post is divided into several parts: intro, cool features, getting started and the K* world.

Disclaimer: Many of the stuff written here is based on beta1 and then beta2 which was released as I was into writing. Lots of stuff is bound to change including the names of the various stuff that can be seen here.

Introduction
ASP.NET 5 a.k.a vNext (temp name) is a major change to ASP.NET programming. It includes many things. This isn’t just an upgrade of several .NET assemblies, but it is also a concept change. There are quite a few resources available on the internet detailing the vNext changes in depth so instead of repeating them here I will settle for providing several references:

Cool vNext features
There are quite a few cool features but I find the following two to be most significant:

Cross Platform
The ability to run ASP.NET over Linux or Mac is a long awaited revolution (did someone just shout Mono?). Time and again I encountered customers who were opposed to use Windows based servers just because they are Microsoft’s. The option to develop .NET on a Windows machine and run it over a non-Windows server is something I really look forward to. For Windows based servers, IIS is supported but not required. Your app can also self host itself.

Yes, I am well aware of the Mono project and that it exists for years. But it makes a world of a difference to have Microsoft officially support this capability.

On-the-fly code compilation
Up until now this feature was available only to Web Site development (File->New->Web Site). In a Web Application (File->New->Project->Web) you can change a cshtml/aspx file, refresh the browser and watch the changes. But in Web Site you can also change the “code behind” files (e.g. aspx.cs), handlers, App_Code, resx files, web services, global.asax and basically everything which isn’t a compiled DLL. This allowed you to make changes on a deployed environment. This is a very important ability as it allows you to change the code using your preferred Notepad app without requiring Visual Studio and a compiler. Why is this important? Here are several examples: a) you can insert debug messages to understand a weird behavior on a production server; b) potentially fix errors on the spot without having to redeploy the entire app or a hotfix; or c) simply change a resource file. Time and again I used this ability on different servers for various purposes. In fact, to me this cool “on the fly” compilation was probably the most significant capability that made me time and again choose Web Site over Web Application. But that also means Web Forms over MVC.

On a side note, to be honest, up until now I am not convinced that MVC is a better paradigm than Web Forms. I also prefer Web Forms because of the great PageMethods/WebMethods js client proxies. Unfortunately it is clear that Web Forms will become more and more obsolete as Microsoft pushes MVC.

vNext works with MVC. Not with Web Forms. Web Forms continues to be supported for now but it will not enjoy the vNext features. But I was very thrilled to hear and see that vNext allows on the fly compilation too. Not only can you change Controllers and Models and run your software, but you can also change vNext Class Libraries and change them using your favorite Nodepad – and that – is something that you cannot do in a Web Site – you cannot change a compiled DLL using notepad! This is a very cool feature indeed, although it does made you wonder how you are supposed to protect your deployed code from hackers who may want to change your license mechanism or bypass your security. When I asked Scott Hunter about this, he replied that there is a pre-compilation module and that it will be possible to precompile the entire site. I’m not sure that it means that you can pre-compile a single assembly. Perhaps the way to over come this will be to reference a regular class library from vNext (it is doable – you can “wrap” an regular assembly as a vNext assembly and use it from a vNext app (I will demonstrate this in the next blog post).

However there is currently a difference in the on-the-fly compilation in favor of Web Site over vNext: In vNext, every change to the code (excluding cshtml) – will trigger a reset of the host. For example changing Controller code while running in IIS Express will not only restart the App Domain but will actually terminate the process and recreate a different one. This means losing any state your application may have had (statics, caching, session etc). With Web Site you can change quite a few files without losing your state (App_Code or resx files will restart the App Domain, but almost any other file change such as ashx/asmx that have no code behind or aspx.cs/ascx.cs – will work great). So making changes during development will not lose your state, or making changes on a production server – does not necessarily mean that all your users get kicked out or lose their session state. The current behavior in vNext is different and limited. I emailed this to Scott Hunter and he replied that if they do decide to support this, it’ll be most likely post RTM. I sure hope that this will be on their TODO list.

Other cool features
There are several other features which are also important. Using vNext you can have side-by-side .NET runtimes. Imagine the following scenario: you code an application using vNext and deploy it. Several months afterwards you develop another app using vNext “version 2”. You need to run both apps on the same server. Today you cannot do that because the developed apps all use the .NET installed on the same machine. An app developed to run using .NET 4 might break if you install .NET 4.5 on the same server to support a different app. With vNext you should be able to deploy your app with the .NET runtime assemblies that it was designated to be used with. More over, vNext supports a “core set” of .NET dlls for the server. So not only you do not have to install irrelevant Windows Updates (e.g. hotfixes for WPF), but the size of the deployed dlls is greatly reduced and makes it feasible to be deployed with your app.

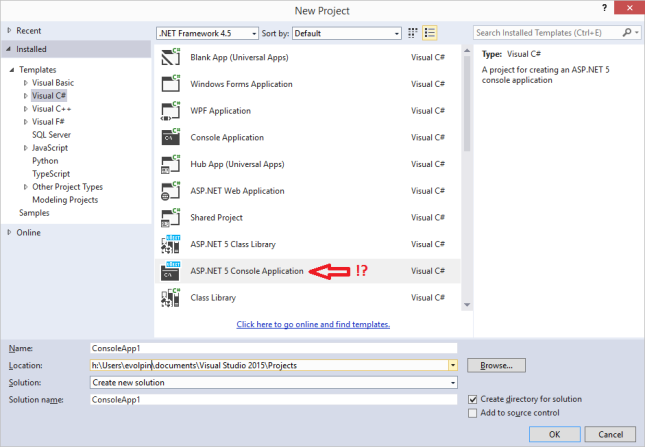
One more feature I find interesting the the ASP.NET Console Application. What!? ASP.NET Console Application!?  Basically this means writing a Console application which has no exe. No build. The same vNext mechanism, compiling on-the-fly your vNext MVC app will be the one compiling and running your Console app. Eventually when released, perhaps vNext will not be categorized as an ASP.NET only component. vNext (or however it will be eventually named) will probably be categorized as a “new .NET platform”, capable of running MVC, Console app or whatever Microsoft is planning to release based on the on-the-fly-no-build platform. Although I did not try it, I assume that you can run a vNext Console app on a Linux or Mac (disclaimer: I haven’t yet tried running vNext on a non-Windows platform).

console


Getting started

  1. Download and install VS 2015 Preview build (http://www.visualstudio.com/en-us/downloads/visual-studio-2015-downloads-vs.aspx).
  2. Create a new vNext Web Application using File->New->Project->Web->ASP.NET Web Application. Select ASP.NET 5 Started Web with the vNext icon.
  3. After the starter project opens, notice the “run” menu (F5). It should point to IIS Express by default. Run using F5.

If all goes well, the demo website will be launched using IIS Express. Going back to VS in vNext there are several noticeable changes that can be seen in the Solution Explorer:

  • global.json: this is a solution level config file. Currently it holds references to source and test folders. I assume further solution and global projects related configuration will be placed in this file. A usage of this would be if you would like to specify external source files and packages. Taking Scott Hanselman’s example: you can download MVC source in order to fix a bug point to it locally instead of using the official release – at least until Microsoft fixes it. Personally I see myself using it to debug and step through .NET code. I have had more than enough situations struggling to understand under the hood behavior by disassembling .NET dlls and trying to figure out what I was doing wrong. As somehow the ability to download the .NET released PDBs never worked well for me, downloading the actual source code and debugging it locally seems useful. Another usage of this file is for wrapped .NET class libraries (beta2 CTP5) which I will describe in the next blog post.
  • project.json: this somewhat resembles the web.config. It contains “different kinds” of configurations, commands, dependencies etc. Dependencies are basically “packages”: NuGet packages or your very own custom vNext class libraries.
  • Static files of the website reside under wwwroot. This way there’s a clean separation from the website’s static files and the actual MVC code. (You can change from wwwroot to a different root.)
  • Startup.cs. This is the entry point in vNext. If you place breakpoints in the different methods in this file you will see that when the website starts this is indeed the starting point. Taking a look at the code in Startup.cs of the starter project you may notice that there are many things that we are used to receive for granted such as identity authentication, static files and MVC itself. In vNext we are supposed to “opt in” to the services we want, giving us full control of the http pipeline.

            // Add static files to the request pipeline.
            app.UseStaticFiles();

            // Add cookie-based authentication to the request pipeline.
            app.UseIdentity();

            // Add MVC to the request pipeline.
            app.UseMvc(routes =>
            {
                routes.MapRoute(
                    name: "default",
                    template: "{controller}/{action}/{id?}",
                    defaults: new { controller = "Home", action = "Index" });

                // Uncomment the following line to add a route for porting Web API 2 controllers.
                // routes.MapWebApiRoute("DefaultApi", "api/{controller}/{id?}");
            });

The K* world

An ASP.NET vNext application is not supposed to be bound to IIS or IIS Express as we are used to. In fact, it can be self-hosted and if I understood correctly, it should also run well on other platforms which are compatible with OWIN. It basically means that IIS is no longer a mandatory requirement for running ASP.NET applications. Any web server compatible with OWIN should be able to run a vNext application! OWIN:

OWIN defines a standard interface between .NET web servers and web applications. The goal of the OWIN interface is to decouple server and application

A quick demonstration of this capability is to change the “run” menu from the default IIS Express to “web” (in the starter project) and then running the web site (this is available in the latest update of the VS2015 preview – CTP5).

run menu

Notice that the running process is shown within a console window. It is the klr.exe and it is located within C:\Users\evolpin\.kre\packages\KRE-CLR-x86.1.0.0-beta2\bin. To understand what happened here we need to further understand how vNext works and clarify the meaning of KRE, KVM and K.

As previously mentioned the vNext world will have the capability to run side-by-side. It is also an open source, so you can download it and make changes. It means that development will change from what we are used to. Today when you start development you know that you’re usually bound to a specific version of the framework that is installed on your dev machine (e.g. .NET 4.5.1). In the vNext world you may have multiple .NET runtimes for different projects running on the same machine. Development could become an experience which allows you to develop alongside the latest .NET builds. Microsoft is moving away from today’s situation that you have to wait for the next .NET update to get the latest bug fixes or features, to a situation that you can download in-development code bits or the latest features without having to wait for an official release.

Getting back to the version of the framework, the KRE (K Runtime Environment) basically is a “container” of the .NET packages and assemblies of the runtime. It is the actual .NET CLR and packages that you will be running your code with (and again, you can target different versions of the KRE on the same server or dev machine).

Now that we have a more or less understanding of what is the KRE and that you may have different KRE versions, it is time to get acquainted with a command line utility called KVM (K Version Manager). This command line utility is supposed to assist in setting up and configuring the KRE runtime that you will use. It is used to setup multiple KRE runtimes, switch between them etc. Currently in the beta stages you need to download the KVM manually but I assume that it’ll be deployed with a future VS release.

To download and install go to: https://github.com/aspnet/home#install-the-k-version-manager-kvm. There is a Windows powershell command line to install. Just copy-paste it to a cmd window and within a short time KVM will be available for you to use.

kvm-install

If you open the highlighted folder you will see the KVM scripts. From now on you should be able to use the KVM from every directory as it is in the PATH. If you go to the parent folder you can see aliases (KREs may have aliases) and packages, which actually contain different KRE versions you have locally. If you open <your profile>\.kre\packages\KRE-CoreCLR-x86.1.0.0-beta1\KRE-CoreCLR-x86.1.0.0-beta1\bin (will be different if you have a different beta installed), you will actually see all the .NET stuff of the Cloud Optimized version. That 13MB is the .NET used to run your cloud optimized server code (see Scott Hunter and Scott Hanselman’s video).

Re-open a cmd window (to allow the PATH changes to take effect). If you type ‘kvm’ and press enter you’ll see a list of kvm commands. An important kvm command is ‘kvm list‘. It will list the installed KRE versions that you have ready for your account:

kvm-list

As you can see there are 4 runtime versions installed for my user account so far, including 32/64 versions and CLR and CoreCLR. To make a particular runtime active you need to ‘kvm use‘ it. For example: ‘kvm use 1.0.0-beta1 -r CoreCLR’ will mark it as Active:

kvm-list2

As you can see, ‘kvm use’ changes the PATH environment variable to point to the Active KRE. We need this PATH change to allow us to use the ‘k‘ batch file that exists in the targeted KRE folder. The K batch file allows to perform several things within the currently active KRE env (see below). In short, this is one way to switch between different KRE versions on the same machine for the current user account (side-by-side versioning.)

Just to make things a little clearer, I went to the KRE folders (C:\Users\evolpin\.kre\packages on my machine and account) and found the k.cmd batch file in each of them. I edited a couple of them: x86 CLR and CoreCLR. In each cmd file I placed an “echo” with the version and then used the ‘kvm use’ to switch between them and run ‘k’ per active env. This is what it looks like:

kvm-list3

You can upgrade the versions of the KRE by using ‘kvm upgrade‘. Note that the ‘kvm upgrade’ does not upgrade all KRE’s at once so you may have to add some command line parameters to upgrade specific KRE versions. In the example below, I have requested to upgrade the CoreCLR KRE:

kvm upgrade

After upgrading the x86 CLR and CoreCLR I found two new folders: C:\Users\evolpin\.kre\packages\KRE-CLR-x86.1.0.0-beta2 and C:\Users\evolpin\.kre\packages\KRE-CoreCLR-x86.1.0.0-beta2 as expected.

OK, so why did we go through all this trouble? As mentioned earlier, each KRE comes with the ‘k’ batch file (located for example in: C:\Users\evolpin\.kre\packages\KRE-CoreCLR-x86.1.0.0-beta1\bin). ‘k’ is used for various stuff such as running the vNext Console Apps or running the self-hosted env. Now is a good time to go back and remember that the website was last run not by IIS Express but by switching to “web” and running a self-hosted site using the klr.exe process (remember?). If we open the project.json file of the Starter project we can observe the “web” command in the “commands” section:


"web": "Microsoft.AspNet.Hosting --server Microsoft.AspNet.Server.WebListener --server.urls http://localhost:5000",

This basically means that when we run the “web” command, the Asp.Net host within Microsoft.AspNet.Hosting will launch a listener on port 5000. In the command line we can use ‘k web’ to actually instruct the currently active KRE to run the “web” command like so (must be in the same folder as project.json is located or an exception will be thrown):

k web

So now we know what happened in VS when we switched to “web” in the “run” menu earlier: VS was actually running the KRE using the “web” command similar to typing ‘k web’ from the command line.

To summarize my understanding so far:

  • KRE is the current .NET runtime being used.
  • KVM is the utility which manages the KREs for my account, allowing me to upgrade or switch between the active KRE.
  • K is a batch file which needs to be invoked in the folder of the app allowing me to run vNext commands. project.json needs to be available in order for ‘k’ to know what to do. K is relevant to the active KRE.

Conclusions

I see vNext as a major leap and I think MS is on the right path although there’s still a long way to go. I recommend going through the videos specified in the beginning of this blog post, especially the two videos with Scott Hanselman.

In my next post I will plan to discuss vNext and Class Libraries.


Leave a comment

Posted by on 04/01/2015 in Software Development


Tags: , ,

CSRF and PageMethods / WebMethods

If you’re interested in the code shown in this post, right-click here, click Save As and rename to zip.

In short, Cross-Site Request Forgery (CSRF) attack is one that uses a malicious website to send requests to a targeted website that the user is logged into. For example, the user is logged-in to a bank in one browser tab and uses a second tab to view a different (malicious) website, sent via email or social network. The malicious website invokes actions on the target website, using the fact that the user is logged into it in the first tab. Example for such attacks can be found on the internet (see Wikipedia).

CSRF prevention is quite demanding. If you follow the Cross-Site Request Forgery (CSRF) Prevention Cheat Sheet you’ll noticed that the general recommendation is to use a “Synchronizer Token Pattern”. There are other prevention techniques listed but also specified are their disadvantages. The Synchronizer Token Pattern requires that request calls will have an anti-forgery token that will be tested on the server side. A lack of such token or an invalid one will result in a failure of the request.

ASP.NET WebForms are supposed to prevent attacks on two levels: “full postback” levels (which you can read here how to accomplish) and on Ajax calls. According to a post made by Scott Gu several years ago, ASP.NET Ajax web methods are CSRF-safe because they handle only POST by default (which is known today as an insufficient CSRF prevention technique) and because they require a content type header of application/json, which are not added by the browser when using html element tags for such an attack. It is more than possible that I am missing something but in my tests I found this claim to be incorrect. I found no problem invoking a web method from a different website using GET from a script tag. Unfortunately ASP.NET didn’t detect nor raise any problem doing so (as will be shown below).

Therefore I was looking into adding a Synchronizer Token Pattern onto the requests. In order not to add token to every server side methods’ arguments, one technique is to add the CSRF token to your request’s headers. There are several advantages to using this technique: you don’t need to specify a token argument in your server and client method calls, and more importantly: you do not need to modify your existing website web methods. If you’re using MVC and jQuery Ajax you can achieve this quite easily as can be shown here or you can follow this guide. However if you are using PageMethods/WebMethods, the Synchronizer Token Pattern can prove more difficult as you’ll need to intercept the http request to add that header.

Test websites
I set up a couple of websites for this solution. One website simulates the bank and the other simulates an attacker.
The bank website has PageMethods and WebMethods. The reasons I am setting up a PageMethod and a WebMethod are to demonstrate both and because the CSRF token is stored in session and for WebMethods session is not available by default (as opposed to PageMethods).

public partial class _Default : System.Web.UI.Page
{
    [WebMethod]
    public static bool TransferMoney(int fromAccount, int toAccount, int amount)
    {
        // logic

        return true;
    }
}
[System.Web.Script.Services.ScriptService]
public class MyWebService  : System.Web.Services.WebService {

    [WebMethod]
    public bool TransferMoney(int fromAccount, int toAccount, int amount)
    {
        // logic

        return true;
    }
}

A bank sample code for invoking both methods:

<asp:ScriptManager runat="server" EnablePageMethods="true">
    <Services>
        <asp:ServiceReference Path="~/MyWebService.asmx" />
    </Services>
</asp:ScriptManager>
<input type="button" value='WebMethod' onclick='useWebMethod()' />
<input type="button" value='PageMethod' onclick='usePageMethod()' />
<script type="text/javascript">
    function usePageMethod() {
        PageMethods.TransferMoney(123, 456, 789, function (result) {

        });
    }

    function useWebMethod() {
        MyWebService.TransferMoney(123, 456, 789, function (result) {

        });
    }
</script>

This is how it looks like:
1

The web.config allows invoking via GET (note: you don’t have to allow GET; I’m deliberately allowing a GET to demonstrate an easy CSRF attack and how this solution attempts to block such calls):

<configuration>
  <system.web>
    <compilation debug="true" targetFramework="4.0" />
    <webServices>
      <protocols>
        <add name="HttpGet" />
        <add name="HttpPost" />
      </protocols>
    </webServices>
  </system.web>
</configuration>

The attacking website is quite simple and demonstrates a GET attack via the script tag:

<script src='http://localhost:55555/MyWebsite/MyWebService.asmx/TransferMoney?fromAccount=111&toAccount=222&amount=333'></script>
<script src='http://localhost:55555/MyWebsite/Default.aspx/TransferMoney?fromAccount=111&toAccount=222&amount=333'></script>

As you can see, running the attacking website easily calls the bank’s WebMethod:
2

Prevention
The prevention technique is as follows:

  1. When the page is rendered, generate a unique token which will be inserted into the session.
  2. On the client side, add the token to the request headers.
  3. On the server side, validate the token.

Step 1: Generate a CSRF validation token and store it in the session.

public static class Utils
{
    public static string GenerateToken()
    {
        var token = Guid.NewGuid().ToString();
        HttpContext.Current.Session["RequestVerificationToken"] = token;
        return token;
    }
}
  • Line 5: I used a Guid, but any unique token generation function can be used here.
  • Line 6: Insert token into the session. Note: you might consider ensuring having a Session.

Note: you might have to “smarten up” this method to handle error pages and internal redirects as you might want to skip token generation in certain circumstances. You may also check if a token already exists prior to generating one.

Step 2: Add the token to client requests.

<script type="text/javascript">
    // CSRF
    Sys.Net.WebRequestManager.add_invokingRequest(function (sender, networkRequestEventArgs) {
        var request = networkRequestEventArgs.get_webRequest();
        var headers = request.get_headers();
        headers['RequestVerificationToken'] = '<%= Utils.GenerateToken() %>';
    }); 

    function usePageMethod() {
        PageMethods.TransferMoney(123, 456, 789, function (result) {

        });
    }

    function useWebMethod() {
        MyWebService.TransferMoney(123, 456, 789, function (result) {

        });
    }
</script>
  • Line 3: Luckily ASP.NET provides a client side event to intercept the outgoing request.
  • Line 6: Add the token to the request headers. The server side call to Utils.GenerateToken() executes on the server side as shown above, and the token is rendered onto the client to be used here.

Step 3: Validate the token on the server side.

To analyze and validate the request on the server side, we can use the Global.asax file and the Application_AcquireRequestState event (which is supposed to have the Session object available by now). You may choose a different location to validate the request.

protected void Application_AcquireRequestState(object sender, EventArgs e)
{
    var context = HttpContext.Current;
    HttpRequest request = context.Request;

    // ensure path exists
    if (string.IsNullOrWhiteSpace(request.PathInfo))
        return;

    if (context.Session == null)
        return;
        
    // get session token
    var sessionToken = context.Session["RequestVerificationToken"] as string;

    // get header token
    var token = request.Headers["RequestVerificationToken"];

    // validate
    if (sessionToken == null || sessionToken != token)
    {
        context.Response.Clear();
        context.Response.StatusCode = 403;
        context.Response.End();
    }
}
  • Line 7: Ensure we’re operating on WebMethods/PageMethods. For urls such as: http://localhost:55555/MyWebsite/Default.aspx/TransferMoney, TransferMoney is the PathInfo.
  • Line 10: We must have the session available to retrieve the token from. You may want to add an exception here too if the session is missing.
  • Line 14: Retrieve the session token.
  • Line 17: Retrieve the client request’s token.
  • Line 20: Token validation.
  • Line 22-24: Decide what to do if the token is invalid. One option would be to return a 403 Forbidden (you can also customize the text or provide a subcode).

When running our bank website now invoking the PageMethods you can see the token (the asmx WebMethod at this point doesn’t have a Session so it can’t be properly validated). Note that the request ended successfully.
3

When running the attacking website, note that the PageMethod was blocked, but not the asmx WebMethod.

4

  • The first TransferMoney is the unblocked asmx WebMethod, as it lacks Session support vital to retrieve the cookie.
  • The second TransferMoney was blocked as desired.

Finally we need to add Session support to our asmx WebMethods. Instead of going thru all the website’s asmx WebMethods modifying them to require the Session, we can add the session from a single location in our Global.asax file:

private static readonly HashSet<string> allowedPathInfo = new HashSet<string>(StringComparer.InvariantCultureIgnoreCase) { "/js", "/jsdebug" };
protected void Application_BeginRequest(Object sender, EventArgs e)
{
    if (".asmx".Equals(Context.Request.CurrentExecutionFilePathExtension) && !allowedPathInfo.Contains(Context.Request.PathInfo))
        Context.SetSessionStateBehavior(SessionStateBehavior.Required);
}
  • Line 1: Paths that we would like to exclude can be listed here. asmx js and jsdebug paths render the client side proxies and do not need to be validated.
  • Line 4-5: If asmx and not js/jsdebug, add the Session requirement so it becomes available for the token validation later on.

Now running the attacking website we can see that our asmx was also blocked:
5

Addendum

  • Naturally you can add additional hardening as you see fit.
  • Also important is to note that using the Session and the suggested technique has an issue when working in the same website with several tabs, as each time the Utils.GenerateToken is called it replaces the token in the session. So might consider also checking the referrer header to see whether to issue a warning instead of throwing an exception, or simply generating the token on the server side only once (i.e. checking if the token exists and only if not then generate it.)
  • Consider adding a “turn off” switch to CSRF in case you run into situations that you need cancel this validation.
  • Moreover: consider creating an attribute over methods or web services that will allow skipping the validation. You can never know when these might come in handy.
 
5 Comments

Posted by on 07/09/2014 in Software Development


Tags: , ,

Taking a [passport] photo using your camera and HTML 5 and uploading the result with ASP.NET Ajax

If you just want the sample, right click this link, save as, rename to zip and extract.

7

You can use your HTML 5 browser to capture video and photos. That is if your browser supports this feature (at the time of this writing, this example works well on Firefox and Chrome but not IE11).
I have followed some good references on the internet on how to do that, but I also needed some implementation on how to take a “passport” photo and upload the result. This is the intention of this post.

Steps:

  1. Capture video and take snapshot.
  2. Display target area.
  3. Crop the photo to a desired size.
  4. Upload the result to the server.

Step 1: Capture video and take snapshot.
This step relies mainly on the Eric Bidelman’s excellent article. After consideration I decided not to repeat the necessary steps for taking a snapshot using HTML 5, so if you require detailed explanation please read his good article. However the minimum code for this is pretty much straight forward so consider reading on. What you basically need is a browser that supports the video element and getUserMedia(). Also required is a canvas element for showing a snapshot of the video source.

<!DOCTYPE html>
<html>
<head>
    <title></title>
</head>
<body>
    <video autoplay width="320" height="240"></video>
    <canvas width='320' height='240' style="border:1px solid #d3d3d3;"></canvas>
    <div>
        <input type="button" value="start capture" onclick="startCapture()" />
        <input type="button" value="take snapshot" onclick="takePhoto()" />
        <input type="button" value="stop capture" onclick="stopCapture()" />
    </div>
    <script type="text/javascript">
        var localMediaStream = null;
        var video = document.querySelector('video');
        var canvas = document.querySelector('canvas');

        function takePhoto() {
            if (localMediaStream) {
                var ctx = canvas.getContext('2d');
                ctx.drawImage(video, 0, 0, 320, 240);
            }
        }

        navigator.getUserMedia = navigator.getUserMedia || navigator.webkitGetUserMedia || navigator.mozGetUserMedia || navigator.msGetUserMedia;
        window.URL = window.URL || window.webkitURL;

        function startCapture() {
            navigator.getUserMedia({ video: true }, function (stream) {
                video.src = window.URL.createObjectURL(stream);
                localMediaStream = stream;
            }, function (e) {
                console.log(e);
            });
        }

        function stopCapture() {
            video.pause();
            localMediaStream.stop();
        }
    </script>
</body>
</html>

Several points of interest:

  • Line 7: Video element for showing the captured stream. My camera seems to show a default of 640×480 but here this is set to 320×240 so it will take less space on the browser. Bear this in mind, it’ll be important for later.
  • Line 8: Canvas element for the snapshots. Upon clicking ‘take photo’, the captured stream is rendered to this canvas. Note the canvas size.
  • Line 22: Drawing the snapshot image onto the canvas.
  • Line 26: Consider testing support for getUserMedia.
  • Line 30: Capture video.

The result, after starting a capture and taking a snapshot (video stream is on the left, canvas with snapshot is to the right):
2

Step 2: Display target area.
As the camera takes pictures in “landscape”, we will attempt to crop the image to the desired portrait dimensions. Therefore the idea is to place a div on top of the video element to mark the target area, where the head is to be placed.

4

The code:

<!DOCTYPE html>
<html>
<head>
    <title></title>
    <style type="text/css">
        .container {
            width: 320px;
            height: 240px;
            position: relative;
            border: 1px solid #d3d3d3;
            float: left;
        }

        .container video {
            width: 100%;
            height: 100%;
            position: absolute;
        }

        .container .photoArea {
            border: 2px dashed white;
            width: 140px;
            height: 190px;
            position: relative;
            margin: 0 auto;
            top: 40px;
        }

        canvas {
            float: left;
        }

        .controls {
            clear: both;
        }
    </style>
</head>
<body>
    <div class="container">
        <video autoplay></video>
        <div class="photoArea"></div>
    </div>
    <canvas width='320' height='240' style="border: 1px solid #d3d3d3;"></canvas>
    <div class="controls">
        <input type="button" value="start capture" onclick="startCapture()" />
        <input type="button" value="take snapshot" onclick="takePhoto()" />
        <input type="button" value="stop capture" onclick="stopCapture()" />
    </div>
    <script type="text/javascript">
        var localMediaStream = null;
        var video = document.querySelector('video');
        var canvas = document.querySelector('canvas');

        function takePhoto() {
            if (localMediaStream) {
                var ctx = canvas.getContext('2d');
                ctx.drawImage(video, 0, 0, 320, 240);
            }
        }

        navigator.getUserMedia = navigator.getUserMedia || navigator.webkitGetUserMedia || navigator.mozGetUserMedia || navigator.msGetUserMedia;
        window.URL = window.URL || window.webkitURL;

        function startCapture() {
            navigator.getUserMedia({ video: true }, function (stream) {
                video.src = window.URL.createObjectURL(stream);
                localMediaStream = stream;
            }, function (e) {
                console.log(e);
            });
        }

        function stopCapture() {
            video.pause();
            localMediaStream.stop();
        }
    </script>
</body>
</html>

As you can see, the code was modified to place the dashed area on top of the video. Points of interest:

  • Lines 20-27: note the dimensions of the target area. Also note that the target area is positioned horizontally automatically using ‘margin’.
  • Line 41: The dashed area.

Step 3: Crop picture to desired size.
Luckily the drawImage() method can not only resize a picture but also crop it. A good reference on drawImage is here, and the very good example is here. Still, this is tricky as this isn’t an existing image as shown in the example, but a captured video source which is originally not 320×240 but 640×480. It took me some time to understand that and figure out that it means that the x,y,width and height of the source arguments should be doubled (and if this understanding is incorrect I would appreciate if someone can comment and provide the correct explanation).

As cropping might be a confusing business, my suggestion is to first “crop without cropping”. This means invoking drawImage() to crop, but ensuring that the target is identical to the source in dimensions.

function takePhoto() {
    if (localMediaStream) {
        var ctx = canvas.getContext('2d');
        // original draw image
        //ctx.drawImage(video, 0, 0, 320, 240); 

        // crop without cropping: source args are doubled; 
        // target args are the expected dimensions
        // the result is identical to the previous drawImage
        ctx.drawImage(video, 0, 0, 640, 480, 0, 0, 320, 240);
    }
}

The result:
5

Let’s review the arguments (skipping the first ‘video’ argument):

  • The first pair are the x,y of the starting points of the source.
  • The second pair are the width and height of the source.
  • The third pair are the x,y of the starting points of the target canvas (these can be greater than zero, for example if you would like to have some padding).
  • The fourth pair are the width and height of the target canvas, effectively allowing you also to resize the picture.

Now let’s review the dimensions in our case:
6

In this example the target area is 140×190 and starts at y=40. As the width of the capture area is 320 and the target area is 140, each margin is 90. So basically we should start cropping at x=90.

But since in the source picture everything is doubled as explained before, the drawImage looks different as the first four arguments are doubled:

function takePhoto() {
    if (localMediaStream) {
        var ctx = canvas.getContext('2d');
        //ctx.drawImage(video, 0, 0, 320, 240); // original draw image
        //ctx.drawImage(video, 0, 0, 640, 480, 0, 0, 320, 240); // entire image

        //instead of using the requested dimensions "as is"
        //ctx.drawImage(video, 90, 40, 140, 190, 0, 0, 140, 190);

        // we double the source args but not the target args
        ctx.drawImage(video, 180, 80, 280, 380, 0, 0, 140, 190);
    }
}

The result:
7

Step 4: Upload the result to the server.
Finally we would like to upload the cropped result to the server. For this purpose we will take the image from the canvas and set it as a source of an img tag.

<!DOCTYPE html>
<html>
<head>
    <title></title>
    <style type="text/css">
        .container {
            width: 320px;
            height: 240px;
            position: relative;
            border: 1px solid #d3d3d3;
            float: left;
        }

        .container video {
            width: 100%;
            height: 100%;
            position: absolute;
        }

        .container .photoArea {
            border: 2px dashed white;
            width: 140px;
            height: 190px;
            position: relative;
            margin: 0 auto;
            top: 40px;
        }

        canvas, img {
            float: left;
        }

        .controls {
            clear: both;
        }
    </style>
</head>
<body>
    <div class="container">
        <video autoplay></video>
        <div class="photoArea"></div>
    </div>
    <canvas width='140' height='190' style="border: 1px solid #d3d3d3;"></canvas>
    <img width="140" height="190" />
    <div class="controls">
        <input type="button" value="start capture" onclick="startCapture()" />
        <input type="button" value="take snapshot" onclick="takePhoto()" />
        <input type="button" value="stop capture" onclick="stopCapture()" />
    </div>
    <script type="text/javascript">
        var localMediaStream = null;
        var video = document.querySelector('video');
        var canvas = document.querySelector('canvas');

        function takePhoto() {
            if (localMediaStream) {
                var ctx = canvas.getContext('2d');
                //ctx.drawImage(video, 0, 0, 320, 240); // original draw image
                //ctx.drawImage(video, 0, 0, 640, 480, 0, 0, 320, 240); // entire image

                //instead of
                //ctx.drawImage(video, 90, 40, 140, 190, 0, 0, 140, 190);

                // we double the source coordinates
                ctx.drawImage(video, 180, 80, 280, 380, 0, 0, 140, 190);
                document.querySelector('img').src = canvas.toDataURL('image/jpeg');
            }
        }

        navigator.getUserMedia = navigator.getUserMedia || navigator.webkitGetUserMedia || navigator.mozGetUserMedia || navigator.msGetUserMedia;
        window.URL = window.URL || window.webkitURL;

        function startCapture() {
            navigator.getUserMedia({ video: true }, function (stream) {
                video.src = window.URL.createObjectURL(stream);
                localMediaStream = stream;
            }, function (e) {
                console.log(e);
            });
        }

        function stopCapture() {
            video.pause();
            localMediaStream.stop();
        }
    </script>
</body>
</html>
  • Lines 43-44: Note that the canvas has been resized to the desired image size, and the new img element is also resized to those dimensions. If we don’t match them we might see the cropped image stretched or resized not according to the desired dimensions.
  • Line 66: We instruct the canvas to return a jpeg as a source for the image (other image formats are also possible, but this is off topic).

This is how it looks like. The video is on the left, the canvas is in the middle and the new img is to the right (it is masked with blue because of the debugger inspection). It is important to notice the debugger, which shows that the source image is a base64 string.
8

Now we can add a button to upload the base64 string to the server. The example uses ASP.NET PageMethods but obviously you can pick whatever is convenient for yourself. The client code:

<!DOCTYPE html>
<html>
<head>
    <title></title>
    <style type="text/css">
        .container {
            width: 320px;
            height: 240px;
            position: relative;
            border: 1px solid #d3d3d3;
            float: left;
        }

        .container video {
            width: 100%;
            height: 100%;
            position: absolute;
        }

        .container .photoArea {
            border: 2px dashed white;
            width: 140px;
            height: 190px;
            position: relative;
            margin: 0 auto;
            top: 40px;
        }

        canvas, img {
            float: left;
        }

        .controls {
            clear: both;
        }
    </style>
</head>
<body>
    <form runat="server">
        <asp:ScriptManager runat="server" EnablePageMethods="true"></asp:ScriptManager>
    </form>
    <div class="container">
        <video autoplay></video>
        <div class="photoArea"></div>
    </div>
    <canvas width='140' height='190' style="border: 1px solid #d3d3d3;"></canvas>
    <img width="140" height="190" />
    <div class="controls">
        <input type="button" value="start capture" onclick="startCapture()" />
        <input type="button" value="take snapshot" onclick="takePhoto()" />
        <input type="button" value="stop capture" onclick="stopCapture()" />
        <input type="button" value="upload" onclick="upload()" />
    </div>
    <script type="text/javascript">
        var localMediaStream = null;
        var video = document.querySelector('video');
        var canvas = document.querySelector('canvas');

        function upload() {
            var base64 = document.querySelector('img').src;
            PageMethods.Upload(base64,
                function () { /* TODO: do something for success */ },
                function (e) { console.log(e); }
            );
        }

        function takePhoto() {
            if (localMediaStream) {
                var ctx = canvas.getContext('2d');
                //ctx.drawImage(video, 0, 0, 320, 240); // original draw image
                //ctx.drawImage(video, 0, 0, 640, 480, 0, 0, 320, 240); // entire image

                //instead of
                //ctx.drawImage(video, 90, 40, 140, 190, 0, 0, 140, 190);

                // we double the source coordinates
                ctx.drawImage(video, 180, 80, 280, 380, 0, 0, 140, 190);
                document.querySelector('img').src = canvas.toDataURL('image/jpeg');
            }
        }

        navigator.getUserMedia = navigator.getUserMedia || navigator.webkitGetUserMedia || navigator.mozGetUserMedia || navigator.msGetUserMedia;
        window.URL = window.URL || window.webkitURL;

        function startCapture() {
            navigator.getUserMedia({ video: true }, function (stream) {
                video.src = window.URL.createObjectURL(stream);
                localMediaStream = stream;
            }, function (e) {
                console.log(e);
            });
        }

        function stopCapture() {
            video.pause();
            localMediaStream.stop();
        }
    </script>
</body>
</html>
  • Line 40: PageMethods support.
  • Line 60-61: Get the base64 string from the image and call the proxy Upload method.

The server side:

public partial class _Default : System.Web.UI.Page
{
    [WebMethod]
    public static void Upload(string base64)
    {
        var parts = base64.Split(new char[] { ',' }, 2);
        var bytes = Convert.FromBase64String(parts[1]);
        var path = HttpContext.Current.Server.MapPath(string.Format("~/{0}.jpg", DateTime.Now.Ticks));
        System.IO.File.WriteAllBytes(path, bytes);
    }
}
  • Line 6: As can be seen in the client debugger above, the base64 has a prefix. So we parse the string on the server side into two sections, separating the prefix metadata from the image data.
  • Line 7: Into bytes.
  • Lines 8-9: Save to a local photo. Replace with whatever you need, such as storing in the DB.

Addendum
There are several considerations you should think of:

  • What happens if the camera provides a source of different dimensions?
  • Browsers that do not support these capabilities.
  • The quality of the image. You can use other formats and get a better photo quality (at the price of a larger byte size).
  • You might be required to clear the ‘src’ attribute of the video and or img elements, if you need to reset them towards taking a new photo and ensuring a “fresh state” of these elements.
 
7 Comments

Posted by on 01/06/2014 in Software Development


Tags: , , , , , ,

The curious case of System.Timers.Timer

Basically there are 3 Timer classes in .NET: WinForms timer, System.Timers.Timer and System.Threading timer. For a non-WinForms your choice is between the two latter timers. For years I have been working with System.Timers.Timer simply because I preferred it’s object model over the alternative.

The pattern that I choose to work with the Timer is always one of AutoReset=false. The reason is because except for rare cases, I do not require the same operation to be concurrently carried out. Therefore I do not require a concurrent re-entrant timer. So this is probably what my usual timer code looks like:

static void Main(string[] args)
{
    System.Timers.Timer t = new System.Timers.Timer();
    t.AutoReset = false;
    t.Interval = 100;
    t.Elapsed += delegate
    {
        try
        {
            DoSomething();
        }
        catch (Exception ex)
        {
            // TODO log exception
        }
        finally
        {
            t.Start();
        }
    };
    t.Start();

    Console.ReadKey();
}

private static void DoSomething()
{
    Thread.Sleep(1000);
}
  • Line 21: First Start of timer.
  • Line 18: When the logic is done, the Elapsed restarts the timer.

The try-catch-finally structure ensures that no exceptions will crash the process and that the timer will restart regardless of problems. This works well and as expected. However, recently I needed to run the code first time immediately and not await the first interval to fire the Elapsed event. Usually that’s also not a problem because you can call DoSomething before the invocation of the first timer Start like so:

static void Main(string[] args)
{
    System.Timers.Timer t = new System.Timers.Timer();
    t.AutoReset = false;
    t.Interval = 100;
    t.Elapsed += delegate
    {
        try
        {
            DoSomething();
        }
        catch (Exception ex)
        {
            // TODO log exception
        }
        finally
        {
            t.Start();
        }
    };

    DoSomething();
    
    t.Start();

    Console.ReadKey();
}

By calling DoSomething() before the first timer, we run the code once and only then turn the timer on. Thus the business code runs immediately which is great. But the problem here is that the first invocation of the DoSomething() is blocking. If the running code takes too long, the remaining code in a real-world app will be blocked. So in this case I needed the first DoSomething() invocation to run in parallel. “No problem” I thought: let’s make the first interval 1ms so that DoSomething() runs on a separate thread [almost] immediately. Then we can change the timer interval within the Elapsed event handler back to the desired 100ms:

static void Main(string[] args)
{
    System.Timers.Timer t = new System.Timers.Timer();
    t.AutoReset = false;
    t.Interval = 1;
    t.Elapsed += delegate
    {
        try
        {
            t.Interval = 100;

            DoSomething();
        }
        catch (Exception ex)
        {
            // TODO log exception
        }
        finally
        {
            t.Start();
        }
    };

    t.Start();

    Console.ReadKey();
}
  • Line 5: First time interval is set to 1ms to allow an immediate first time invocation of DoSometing() on a separate non-blocking thread.
  • Line 10: Changed the interval back to the desired 100ms as before.

I thought that this solves it. First run after 1ms followed by non re-entrant intervals of 100ms. Luckily I had logs in DoSomething() that proved me wrong. It seems like that the Elapsed event handler did in fact fire more than once at a time! I added a reference counter-like mechanism to demonstrate:

static int refCount=0;
static void Main(string[] args)
{
    System.Timers.Timer t = new System.Timers.Timer();
    t.AutoReset = false;
    t.Interval = 1;
    t.Elapsed += delegate
    {
        Interlocked.Increment(ref refCount);
        try
        {
            t.Interval = 100;

            DoSomething();
        }
        catch (Exception ex)
        {
            // TODO log exception
        }
        finally
        {
            Interlocked.Decrement(ref refCount);
            t.Start();
        }
    };

    t.Start();

    Console.ReadKey();
}

private static void DoSomething()
{
    Console.WriteLine(refCount);
    Thread.Sleep(1000);
}

As can be seen below, the reference counter clearly shows that DoSomething() is called concurrently several times.
ref1

As a workaround this behavior can be blocked using a boolean that will be set to true in the beginning of the Elapsed event and back to false at the finally clause, and testing that bool at the start of the Elapsed. If already true, not to proceed to DoSomething(). But this is ugly.

In the real world app things aren’t as clear as in a sample code and I was certain that the problem was with my code. I was absolutely confident that some other activity instantiated more than one class that contained this timer code and therefore I was witnessing multiple timers instantiated and fired. As this wasn’t expected I set out to find the other timers and instances that cause this but found none, which made me somewhat happy because I didn’t expect additional instances, but it also made me frustrated because the behavior was irrational and contradicts what I had known about timers. Finally (and after several hours of debugging!) I decided to google for it and after a while I came across a stackoverflow thread that quoted from MSDN the following (emphasis is mine):

Note If Enabled and AutoReset are both set to false, and the timer has previously been enabled, setting the Interval property causes the Elapsed event to be raised once, as if the Enabled property had been set to true. To set the interval without raising the event, you can temporarily set the AutoReset property to true.

Impossible!

OK, let’s remove the interval change within the Elapsed event handler. And behold, the timer works as expected:
ref2

WTF!? Are the writers of this Timer from Microsoft serious?? Is there any logical reason for this behavior?? This sounds like a bug that they decided not to fix but just document this behavior as if it was “by design” (and if anyone can come up with a good reason for this behavior, please comment).

Solution
Despite the MSDN doc, I wasn’t even going to see if setting “AutoReset property to true” temporarily solves it. This is even uglier than having a boolean to test if Elapsed has already fired and is working.

After considering switching to the Threading timer and see if this will provide the desired behavior, I decided to revert to what I consider as a more comfortable solution: I will not change the Interval but set it only once, and simply invoke DoSomething() for the first time in a separate thread:

static int refCount = 0;
static void Main(string[] args)
{
    System.Timers.Timer t = new System.Timers.Timer();
    t.AutoReset = false;
    t.Interval = 100;
    t.Elapsed += delegate
    {
        Interlocked.Increment(ref refCount);
        try
        {
            DoSomething();
        }
        catch (Exception ex)
        {
            // TODO log exception
        }
        finally
        {
            Interlocked.Decrement(ref refCount);
            t.Start();
        }
    };

    Task.Factory.StartNew(() =>
    {
        DoSomething();
        t.Start();
    }, TaskCreationOptions.LongRunning);

    Console.ReadKey();
}

In this solution I simply start a new long running thread, invoke DoSomething() first time and only then start the timer for the other invocations. Here’s the result:
ref3
The first run doesn’t use the timer so the ref counter is 0. The other invocations of Timer’s Elapsed event set the ref count as expected and run only once.

 
Leave a comment

Posted by on 25/04/2014 in Software Development


Tags: