RSS

Tag Archives: jQuery

Posting JavaScript types to MVC 6 in .NET core, using Ajax

This is an update to several posts I did years ago, mainly: https://evolpin.wordpress.com/2012/07/22/posting-complex-types-to-mvc. If you are interested in the source code then download it from here.

In this post are included several methods to post data to .NET core 2.2 MVC controller. The example uses the default MVC template that comes with bootstrap, jQuery validate and unobtrusive scripts.

If you rather just visit a possible custom model binding solution to send multiple objects in a POST JSON request, click here.

The test form is quite simple: a scaffolded Person form with several test buttons.

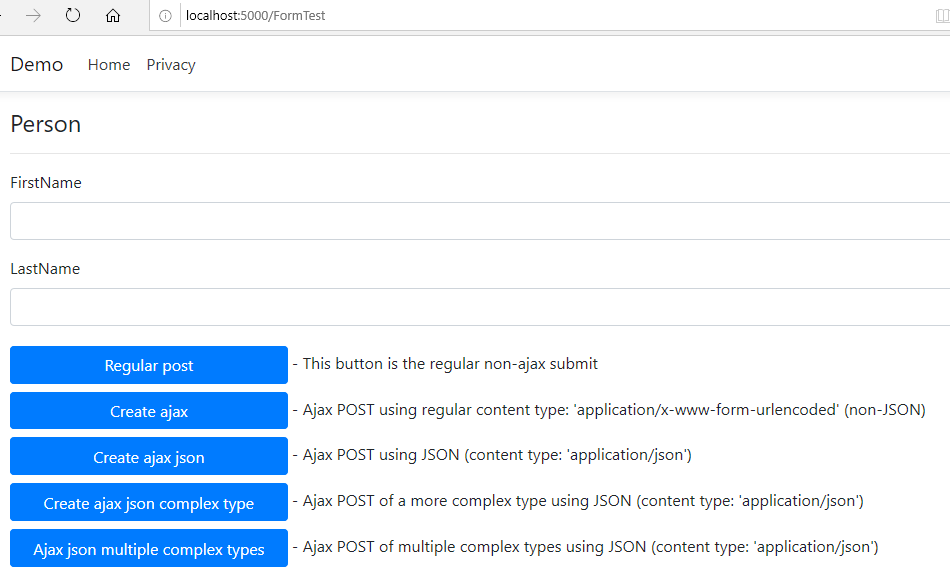
Note the Scripts section beneath the html. It provides the unobtrusive and validate jQuery code. You don’t have to use it and you may very well use whatever validation you prefer. I just preferred to use it as it comes out-of-the-box with the Visual Studio MVC template.

The ViewModel I used for this example is that of a Person:

    public class Person
    {
        [Required]
        public string FirstName { get; set; }
        public string LastName { get; set; }
    }

One more code change that I introduced into my Startup.cs, is to use the DefaultContractResolver. This will override the, well…, default behavior in MVC 6 that returns camel cased JSON (e.f. firstName instead of FirstName). I prefer the original casing.

        public void ConfigureServices(IServiceCollection services)
        {
            services.Configure<CookiePolicyOptions>(options =>
            {
                // This lambda determines whether user consent for non-essential cookies is needed for a given request.
                options.CheckConsentNeeded = context => true;
                options.MinimumSameSitePolicy = SameSiteMode.None;
            });

            services.AddMvc().SetCompatibilityVersion(CompatibilityVersion.Version_2_2)
                .AddJsonOptions(f => f.SerializerSettings.ContractResolver = new DefaultContractResolver());
        }

‘Regular post’ button

The first button is a regular post of the form data. This being a submit button, it’ll auto activate validation.

You can use either this controller code, which receives the IFormCollection (including any form items such as the AntiForgery token).

        [HttpPost]
        [ValidateAntiForgeryToken]
        public ActionResult Create(IFormCollection collection)
        {
            try
            {
                if (!ModelState.IsValid)
                    throw new Exception($"not valid");

                foreach (var item in collection)
                {
                    _logger.LogInformation($"{item.Key}={item.Value}");
                }

                return RedirectToAction(nameof(Index));
            }
            catch
            {
                return View();
            }
        }

Alternatively you can use this code which focuses on binding the posted form variables to the Person C# object:

        [HttpPost]
        [ValidateAntiForgeryToken]
        public ActionResult Create(Person person)
        {
            try
            {
                if (!ModelState.IsValid)
                    throw new Exception($"not valid");

                _logger.LogInformation($"{nameof(person.FirstName)}={person.FirstName}");
                _logger.LogInformation($"{nameof(person.LastName)}={person.LastName}");

                return RedirectToAction(nameof(Index));
            }
            catch
            {
                return View();
            }
        }

Enough of this, where’s the Ajax?

The ‘Create ajax’ button uses the following jQuery to post. Note the ‘beforeSend’ which adds the Anti Forgery token. You must specify this or the request will fail due to the controller code [ValidateAntiForgeryToken] attribute that validates it.

            // Ajax POST using regular content type: 'application/x-www-form-urlencoded'
            $('#btnFormAjax').on('click', function () {

                if (myForm.valid()) {
                    var first = $('#FirstName').val();
                    var last = $('#LastName').val();
                    var data = { FirstName: first, LastName: last };

                    $.ajax({
                        url: '@Url.Action("CreateAjaxForm")',
                        type: 'POST',
                        beforeSend: function (xhr) {
                            xhr.setRequestHeader("RequestVerificationToken",
                                $('input:hidden[name="__RequestVerificationToken"]').val());
                        },
                        data: data
                    }).done(function (result) {
                        alert(result.FullName);
                    });
                }

            });

The controller code is quite the same (I omitted the try-catch for abbreviation purposes). Note, that the returned result in this example is JSON but it doesn’t have to be.

        // Ajax POST using regular content type: 'application/x-www-form-urlencoded' (non-JSON)
        [HttpPost]
        [ValidateAntiForgeryToken]
        public ActionResult CreateAjaxForm(Person person)
        {
            if (!ModelState.IsValid)
                throw new Exception($"not valid");

            _logger.LogInformation($"{nameof(person.FirstName)}={person.FirstName}");
            _logger.LogInformation($"{nameof(person.LastName)}={person.LastName}");

            return Json(new { FullName = $"{person.FirstName} {person.LastName}" });
        }

This is the Ajax request:

OK, but I want to POST JSON and not application/x-www-form-urlencoded

I prefer to post and receive JSON. It is more consistent and will allow me more flexibility to use more complex objects as will be shown later on.

The default ‘contentType’ for $.ajax is ‘application/x-www-form-urlencoded; charset=UTF-8‘ so we did not have to specify it earlier. To send JSON we now specify a content type of ‘application/json; charset=utf-8‘.

The ‘data’ is now converted to JSON using JSON.stringify() common browser method.

The ‘dataType’ indicates expecting a JSON as the return object.

            $('#btnFormAjaxJson').on('click', function () {

                if (myForm.valid()) {
                    var first = $('#FirstName').val();
                    var last = $('#LastName').val();
                    var data = { FirstName: first, LastName: last };

                    $.ajax({
                        url: '@Url.Action("CreateAjaxFormJson")',
                        type: 'POST',
                        beforeSend: function (xhr) {
                            xhr.setRequestHeader("RequestVerificationToken",
                                $('input:hidden[name="__RequestVerificationToken"]').val());
                        },
                        dataType: 'json',
                        contentType: 'application/json; charset=utf-8',
                        data: JSON.stringify(data)
                    }).done(function (result) {
                        alert(result.FullName)
                    });
                }

            });

The controller code has one small but important change: The [FromBody] attribute of the Person argument. Without this, person will not be populated with the values from the request payload and we will waste a lot of time understanding why.

        // Ajax POST using JSON (content type: 'application/json')
        [HttpPost]
        [ValidateAntiForgeryToken]
        public ActionResult CreateAjaxFormJson([FromBody] Person person)
        {
            if (!ModelState.IsValid)
                throw new Exception($"not valid");

            _logger.LogInformation($"{nameof(person.FirstName)}={person.FirstName}");
            _logger.LogInformation($"{nameof(person.LastName)}={person.LastName}");

            return Json(new { FullName = $"{person.FirstName} {person.LastName}" });
        }

This time, the request looks like this:

But what if I want to POST more data?

This is where it gets tricky. Unlike the good old WebMethod/PageMethods which allowed you to post and receive multiple JSON and complex data transparently, unfortunately, in MVC controllers this can’t be done and you can have only a single [FromBody] parameter (why??) as you can read here: https://docs.microsoft.com/en-us/aspnet/web-api/overview/formats-and-model-binding/parameter-binding-in-aspnet-web-api#using-frombody.

So, if you want to send a more complex type, that includes for example arrays or multiple objects, you need to receive them as a single argument. The ‘Create ajax json complex type’ button demonstrates this. The View Model used here is:

    public class Person
    {
        [Required]
        public string FirstName { get; set; }
        public string LastName { get; set; }
    }

    public class People
    {
        public Person[] SeveralPeople { get; set; }
    }

In the sending Javascript, it is very important to note the identically structured ‘people’ object as highlighted below:

             // form ajax with json complex type
            $('#btnFormAjaxJsonComplexType').on('click', function () {

                var joe = { FirstName: 'Joe' };
                var jane = { FirstName: 'Jane' };
                var people = { SeveralPeople: [joe, jane] };

                $.ajax({
                    url: '@Url.Action("CreateAjaxFormJsonComplexType")',
                    type: 'POST',
                    beforeSend: function (xhr) {
                        xhr.setRequestHeader("RequestVerificationToken",
                            $('input:hidden[name="__RequestVerificationToken"]').val());
                    },
                    dataType: 'json',
                    contentType: 'application/json; charset=utf-8',
                    data: JSON.stringify(people)
                }).done(function (result) {
                    alert(result.Count)
                });

            });

The controller code receives a single object:

        // Ajax POST of a more complex type using JSON (content type: 'application/json')
        [HttpPost]
        [ValidateAntiForgeryToken]
        public ActionResult CreateAjaxFormJsonComplexType([FromBody] People people)
        {
            if (!ModelState.IsValid)
                throw new Exception($"not valid");

            foreach (var person in people.SeveralPeople)
            {
                _logger.LogInformation($"{nameof(person.FirstName)}={person.FirstName}");
            }

            return Json(new { Count = people.SeveralPeople.Count() });
        }

And the request:

A step back

While ‘people’ might make sense to send as one array object, what happens if you want to send multiple objects which are less related? Again, in past WebMethods this was trivial and transparent. Here, you are required to send them as a single object. For some reason, Microsoft decided to take a step back from a well working and decent WebMethods that exists for years.

Consider the Javascript below. It looks very much alike the previous example, but this time the ‘data’ is not related to the People class in our server side. Instead, it simply binds two objects together to be sent over as JSON.

Please note that I named the parameters ‘one’ and ‘two’. This will be important for the server side binding.

             // form ajax with multiple json complex types
            $('#btnFormAjaxJsonMultipleComplexTypes').on('click', function () {

                var joe = { FirstName: 'Joe' };
                var jane = { FirstName: 'Jane' };
                var data = { one: joe, two: jane };

                $.ajax({
                    url: '@Url.Action("CreateAjaxFormJsonMultipleComplexType")',
                    type: 'POST',
                    beforeSend: function (xhr) {
                        xhr.setRequestHeader("RequestVerificationToken",
                            $('input:hidden[name="__RequestVerificationToken"]').val());
                    },
                    dataType: 'json',
                    contentType: 'application/json; charset=utf-8',
                    data: JSON.stringify(data)
                }).done(function (result) {
                    alert(result.Count)
                });

            });

The server side controller that we would like to have has two parameters (‘one and ‘two’ as send from the client Javascript), but explained earlier, the default model binder in MVC today does not support it and it would not work.

        // this would FAIL and not work
        [HttpPost]
        [ValidateAntiForgeryToken]
        public ActionResult CreateAjaxFormJsonMultipleComplexType([FromBody] Person one, [FromBody] Person two)
        {
            if (!ModelState.IsValid)
                throw new Exception($"not valid");

            var people = new[] { one, two };
            foreach (var person in people)
            {
                _logger.LogInformation($"{nameof(person.FirstName)}={person.FirstName}");
            }

            return Json(new { Count = people.Length });
        }

I was looking for a way this can be done. Fortunately it seems that we can tailor our own model binder, meaning that we can implement a custom class to bind the request body to our parameters. Here are a couple of references that helped me out:

https://docs.microsoft.com/en-us/aspnet/core/mvc/advanced/custom-model-binding?view=aspnetcore-2.2

https://www.c-sharpcorner.com/article/custom-model-binding-in-asp-net-core-mvc/

Writing a custom binder seems easy enough (although I reckon there is much to learn). You need to code a ‘binding provider’. This gets called once per parameter.

    public class CustomModelBinderProvider : IModelBinderProvider
    {
        public IModelBinder GetBinder(ModelBinderProviderContext context)
        {
            if (/* some condition to decide whether we invoke the custom binder or not */)
                return new CustomModelBinder();

            return null;
        }
    }

The CustomModelBinder needs to do some work parsing content and create an object. That object will be passed to your controller method. This method will also be called once per parameter.

    public class CustomModelBinder : IModelBinder
    {
        public Task BindModelAsync(ModelBindingContext bindingContext)
        {
            var obj =/* some code to populate the parameter that will be passed to your controller method */

            bindingContext.Result = ModelBindingResult.Success(obj);

            return Task.CompletedTask;
        }
    }

You need to modify the ConfigureServices in your Startup class to use this binder.

            services.AddMvc(
                config => config.ModelBinderProviders.Insert(0, new CustomModelBinderProvider()))
                .SetCompatibilityVersion(CompatibilityVersion.Version_2_2)
                .AddJsonOptions(f => f.SerializerSettings.ContractResolver = new DefaultContractResolver());

In my case I wanted to populate not a specific model type (as can be seen in the 2 links above), but something that will populate any parameter type. In other words, I wanted something like the [FromBody] that will work with multiple parameters. So I named it [FromBody2]… I even placed a Required option so if a parameter is missing from the request, it may trigger an exception if set.

    [AttributeUsage(AttributeTargets.Property | AttributeTargets.Parameter, AllowMultiple = false, Inherited = true)]
    public class FromBody2 : Attribute
    {
        public bool Required { get; set; } = false;
    }

Note: originally I did not use [FromBody2], and the custom binder worked for ALL parameters. But then I thought it might be better to have some sort of attribute to gain better control, as input arguments in various requests might be different than what we expect.

My binder provider class is checking whether the parameter has the [FromBody2] parameter. If found, it will also pass it to the custom binder so it can be used internally.

    public class CustomModelBinderProvider : IModelBinderProvider
    {
        public IModelBinder GetBinder(ModelBinderProviderContext context)
        {
            var metaData = context.Metadata as Microsoft.AspNetCore.Mvc.ModelBinding.Metadata.DefaultModelMetadata;
            var attr = metaData?.Attributes?.Attributes?.FirstOrDefault(a => a.GetType() == typeof(FromBody2));
            if (attr != null)
                return new CustomModelBinder((FromBody2)attr);

            return null;
        }
    }

Now the binder itself. This was a bit tricky to write because I am consuming the request body stream, which can be done just once, whereas the custom binder is called once per parameter. Therefore I read the stream once and store it in the HttpContext.Items bag for other parameters. I reckon that there could be much more elegant solutions, but this will do for now. Explanation follows the example.

    public class CustomModelBinder : IModelBinder
    {
        private FromBody2 _attr;
        public CustomModelBinder(FromBody2 attr)
        {
            this._attr = attr;
        }

        public Task BindModelAsync(ModelBindingContext bindingContext)
        {
            if (bindingContext == null)
                throw new ArgumentNullException(nameof(bindingContext));

            var httpContext = bindingContext.HttpContext;
            var body = httpContext.Items["body"] as Dictionary<string, object>;

            // read the request stream once and store it for other items
            if (body == null)
            {
                string json;
                using (StreamReader sr = new StreamReader(httpContext.Request.Body))
                {
                    json = sr.ReadToEnd();

                    body = JsonConvert.DeserializeObject<Dictionary<string, object>>(json);
                    httpContext.Items["body"] = body;
                }
            }

            // attempt to find the parameter in the body stream
            if (body.TryGetValue(bindingContext.FieldName, out object obj))
            {
                JObject jsonObj = obj as JObject;

                if (jsonObj != null)
                {
                    obj = jsonObj.ToObject(bindingContext.ModelType);
                }
                else
                {
                    obj = Convert.ChangeType(obj, bindingContext.ModelType);
                }

                // set as result
                bindingContext.Result = ModelBindingResult.Success(obj);
            }
            else
            {
                if (this._attr.Required)
                {
                    // throw an informative exception notifying a missing field
                    throw new ArgumentNullException($"Missing field: '{bindingContext.FieldName}'");
                }
            }

            return Task.CompletedTask;
        }
    }

Explanation:

  • Line 6: Stores the [FromBody2] instance of the parameter. This will be used later to check on the Required property if the request is missing the expected parameter data.
  • Line 14: Get the HttpContext.
  • Line 15: Check whether we have already cached the body payload.
  • Lines 18-28: A one time (per http request) read of the body payload. It will be deserialized to a Dictionary<string, object> and stored in the HttpContext for later parameters to use. Consider adding further validation code here, maybe checking on the ContentType etc.
  • Line 31: This is the nice part. The ModelBinder is given the name of the parameter. As a reminder, our desired method signature had a couple of arguments: Person ‘one’ and Person ‘two’. So the FieldName would be ‘one’ and in a second invocation ‘two’. This is very useful because we can extract it from the Dictionary.
  • Lines 33-35: We attempt to cast the object to JObject (JSON complex types). If we are successful, we further convert it to the actual parameter type.
  • Lines 39-42: If the object is a primitive non-JObject, we simply cast it according to the expected type. You may consider further validations here or just let it fail if the casting fails.
  • Line 45: We take the final object and pass it as a ‘successful result’. This would be handed over to our controller method.
  • Lines 49-53: If the request payload did not contain the expected parameter name, we may decide to throw an exception if it is marked as Required.

Finally, the controller code looks almost identical to the [failed] example somewhere above. Only this time, the parameters are decorated with [FromBody2]. As a reminder, we did not have to use [FromBody2] at all. This was only in order to gain more control over the binding process and avoid future situations in which this solution might not be suitable.

        // Ajax POST of multiple complex type using JSON (content type: 'application/json')
        [HttpPost]
        [ValidateAntiForgeryToken]
        public ActionResult CreateAjaxFormJsonMultipleComplexType([FromBody2] Person one, [FromBody2] Person two)
        {
            if (!ModelState.IsValid)
                throw new Exception($"not valid");

            var people = new[] { one, two };
            foreach (var person in people)
            {
                _logger.LogInformation($"{nameof(person.FirstName)}={person.FirstName}");
            }

            return Json(new { Count = people.Length });
        }

This looks like this:

We can even add more parameters e.g. a Required ‘three’. The current calling Javascript does not pass ‘three’ so an informative exception will be raised, specifying that ‘three’ is missing.

        // Ajax POST of multiple complex type using JSON (content type: 'application/json')
        [HttpPost]
        [ValidateAntiForgeryToken]
        public ActionResult CreateAjaxFormJsonMultipleComplexType([FromBody2] Person one,
[FromBody2] Person two,
[FromBody2(Required = true)] Person three)
        {
            if (!ModelState.IsValid)
                throw new Exception($"not valid");

            var people = new[] { one, two };
            foreach (var person in people)
            {
                _logger.LogInformation($"{nameof(person.FirstName)}={person.FirstName}");
            }

            return Json(new { Count = people.Length });
        }

Summary: it is really nice to have complete control over everything, but in the end I would expect Microsoft to fix this and provide an out of the box implementation for receiving multiple JSON objects as multiple parameters.

 
2 Comments

Posted by on 09/02/2019 in Software Development


Tags: , , ,

HTML5 Drag and Drop Ajax file upload using jQuery File Upload plugin

If you just want the sample, right click this link, save as, rename to zip and extract.

This post is in a way a continuation of an earlier post, which explains how you can achieve an Ajax File Upload with ASP.NET. Only in this post I’ll focus on how to achieve this using HTML5 Drag and Drop features from a Windows Explorer.

Note: IE9 or below have limited Drag/Drop support so don’t expect this solution to work on those browsers.
Note 2: The FileUpload and jQuery used in this post are not the latest, so some changes maybe required to make this work well with newer versions.

In order to implement drag and drop to an existing File Upload solution, all you have to do is bind three events, two of them toggle CSS classes and have nothing to do with the upload itself, and one of them handles the actual ‘drop’. It’s not that the CSS classes are mandatory in order to get upload to work, it’s simply one of the ways to provide a feedback to the end-user that a drag operation takes place.

Before dragging, the page looks like so:
beforedrag

During the drag operation CSS classes provide a feedback to the user:
drag

The JavaScript used here:

$(function () {
    // file upload
    $('#fileupload').fileupload({
        replaceFileInput: false,
        formData: function (form) {
            return [{ name: "name1", value: "value1" }, { name: "name2", value: "value2"}];
        },
        dataType: 'json',
        url: '<%= ResolveUrl("AjaxFileHandler.ashx") %>',
        done: function (e, data) {
            $.each(data.result, function (index, file) {
                $('<p/>').text(file).appendTo('.divUpload');
            });
        }
    });

    // handle drag/drop
    $('body').bind("dragover", function (e) {
        $('.divUpload').addClass('drag');
        e.originalEvent.dataTransfer.dropEffect = 'copy';
        return false;
    }).bind("dragleave", function (e) {
        $('.divUpload').removeClass('drag');
        return false;
    }).bind("drop", function (e) {
        e.preventDefault();
        $('.divUpload').removeClass('drag');
        var list = $.makeArray(e.originalEvent.dataTransfer.files);
        $('#fileupload').fileupload('add', { files: list });
        return false;
    });
});

The code it quite self-explanatory, but nevertheless here’s a short explanation:

  • Lines 3-15: this is the same code from the previous post. It uses the jQuery FileUpload plugin for Ajax file upload.
  • Lines 18-21: handle a “drag start” event. This simply adds a CSS class to provide a feedback to the user.
  • Lines 22-24: handle a “drag leave” event, and removes the CSS class.
  • Lines 25-30: handles the “drop” event. This is the important stuff. We remove the CSS class that provides a feedback on the dragging, take the select files and add them to the File Upload plugin, which starts the upload. Note that the original files object from the event is converted to an array (“list”), and only then the information is passed on to the File Upload plugin. If you skip this the plugin might not work.
  • Lines 11-13: When done, the file names will be displayed as HTML elements. Change this to whatever you require.

The HTML looks like this:

<div class='divUpload'>
    <div class='file'><input id="fileupload" type="file" name="file" multiple="multiple" /></div>
    <div class='dropzone'><div>drag files here</div></div>
</div>

Not much here either. Mainly different DIVs which are displayed according to the drag/drop events.

  • Line 2: The original file input field.
  • Line 3: The DIV which appears upon drag.

Finally there’s the CSS. I have implemented it one way but naturally this can be done completely differently. The “trick” is to add the “drag” class on the top DIV, which causes the browser to use different CSS rules on the nested DIV elements. The file input field becomes hidden and the drag feedback is shown.

body, html, .divUpload
{
    height: 100%;
    margin: 0;
    overflow: hidden;
    background-color: beige;
}

.divUpload
{
    margin: 8px;
}

.divUpload.drag .file
{
    display: none;
}

.divUpload.drag .dropzone
{
    display: table;
}

.dropzone
{
    border: 3px dashed black;
    display: none;
    font-size: 20px;
    font-weight: bold;
    height: 95%;
    position: relative;
    text-align: center;
    vertical-align: middle;
    width: 99%;
    background-color: rgba(37, 255, 78, 0.33);
}

.dropzone div
{
    display: table-cell;
    vertical-align: middle;
}
  • Line 27: The dropzone is not hidden by default.
  • Line 16: When dragging takes place, the default file field is being hidden.

The result looks like this:
afterdrag

 
4 Comments

Posted by on 24/02/2013 in Software Development


Tags: , , ,

Posting complex JavaScript types to MVC, using Ajax

This post demonstrates how to send Complex client types to MVC using JSON. If you require the same information but for ASP.NET WebForms, you can go and read this post instead.

Note: I published an updated post for MVC6 and ASP.NET core here.

Background
Sending data to MVC using jQuery is something that I wrote about in several blog posts. Just as a quick reminder, this post discusses the basics of sending data, including simple-typed arrays. The problem is that I had to send over an array of complex-typed objects. Originally, this was intended to be a post which performs some sort of a work around by sending a JSON string to the server, and uses a JavaScriptSerializer & dynamics to retrieve the objects. But, after Googling some more it turns out by sending and receiving data in a certain way, MVC will perform this process out of the box, by binding the sent data to your custom server side classes. For simple types, sending data to the server is very “forgiving” and easy. But if you require to send complex types which involve JSON strings – you have to be more strict and follow “the rules”.

If you’re just into the solution, click here. If you would like to see some basic examples and the problem explained, read on.

Basic implementation
Here’s a reminder on how to send simple types, slightly complex types and simple typed arrays. First, this is the server side code:

    public class HomeController : Controller
    {
        public ActionResult Index() { return View("Test"); }

        public ActionResult GotSimple(string name, int age)
        {
            return Content(string.Format("name: {0}; age: {1}", name, age));
        }

        public ActionResult GotArrays(string[] names, int[] ages)
        {
            return Content(string.Format("names: {0}; ages: {1}",
                string.Join(",", names),
                string.Join(",", ages)));
        }

        public ActionResult GotComplexType(string name, int age)
        {
            return Content(string.Format("name: {0}; age: {1}", name, age));
        }
    }

And this is the client code (excluding the buttons html):

<script type="text/javascript">// <![CDATA[
        $(function () {
            $('#sendSimple').click(function () {
                 $.get("@Url.Action("GotSimple")",
                     {
                        name: "Joe" ,
                        age: 20
                     },
                     function (result){
                         alert("Server replied: " + result);
                     }
                 );
            });

            $('#sendArray').click(function () {
                 $.get("@Url.Action("GotArrays")",
                     $.param({
                        names: ["Joe", "Jane"],
                        ages: [20,30]
                     }, true),
                     function (result){
                         alert("Server replied: " + result);
                     }
                 );
            });

            $('#sendComplexType').click(function () {
                var Joe = { name: 'Joe', age: 20};
                $.get("@Url.Action("GotComplexType")",
                    Joe,
                    function (result){
                        alert("Server replied: " + result);
                    }
                );
            });
        });
// ]]></script>

There are three examples here:

  • ‘Simple’ demonstrates sending two simple types and the server receives them “as-is”.
  • ‘Array’ demonstrates that you can send simple typed arrays using $.param with the traditional flag set to true. The server receives them as expected.
  • ‘ComplexType’ shows an even cooler example, that you can send an simple object and receive it’s properties on the server side similarly to the ‘Simple’ example.

Note the traffic sent over to the server: ‘Simple’ (1) and ‘Complex’ (3) send the data exactly the same way, so clearly the server handles the sent data in a similar way. ‘Array’ (2) sends the data in duplicate keys which is received and interpreted by MVC as arrays.

Moreover: MVC also supports receiving the arguments directly to a custom class (e.g. Person), which is really cool:


public ActionResult GotComplexType(Person person)
{
   return Content(string.Format("name: {0}; age: {1}", person.name, person.age));
}

public class Person
{
   public string name { get; set; }
   public int age { get; set; }
}

This actually works (You can read about it here, under “JavaScript and AJAX Improvements”.

Complex typed arrays

But… when I wanted to send an array of complex types, this was more of a problem. First, lets review the client code:

            $('#sendComplexTypeArrays').click(function () {
                var Joe = { name: 'Joe', age: 20};
                var Jane = { name: 'Jane', age: 30};
                $.get("@Url.Action("GotComplexTypeArrays")",
                    $.param({
                        people: [Joe,Jane]
                    }, true),
                    function (result){
                        alert("Server replied: " + result);
                    }
                );
            });

And here is how it is sent over by the browser:

Clearly, this is not what I wanted. OK, let’s try to remove the traditional flag from $.param:

Looks more promising. Let’s review the server side code this time:

public ActionResult GotComplexTypeArrays(dynamic data)
{
    return Content("");
}

Unfortunately “data” is just an object, nothing more, and I did not get what I wanted.

Solution
I Googled and found this post which gave me a good direction. Turns out that MVC will know how to parse your sent data from the client on the server side, but there are a few catches I had to overcome before this properly worked:

  1. (Client) You must send a JSON content-type in the form of: ‘application/json’.
  2. (Client) The data must be POSTed and in JSON format (use JSON.stringify).
  3. (Server) The server data type must match that of the client:
    • Property names must match (although it seems like case-sensitivity is not an issue);
    • Client arrays must match a server IEnumerable type (array, list etc.);
    • Client data type must match the server side data type to a certain extent or you’re risking losing data (e.g. can’t send a client string and receive it as an int on the server side.)
  4. (Server) All properties must be, well, Properties (e.g. get;set; implemented). Can’t use global fields. They should also be public.
  5. (Server) Apparently the name of the argument cannot be identical to one of the properties. I’m not sure why, but this seem to confuse the binder and results in ‘null’. So you cannot call your argument ‘people’, and have a ‘people’ property in that class at the same time. At least not in the immediate class of the argument.

So after making a few changes to my code, here is the client side:

$.ajaxSetup({
    dataType: 'json',
    contentType: 'application/json, charset=utf-8'
});

The above code ensures that Ajax calls sent to the server are with a JSON content-type, and that JSON is to be received from the server (you may choose to add more global jQuery Ajax settings here such as error handling, or POST method etc.).

Important: if you don’t need all of your Ajax calls to be in JSON format, you can simply use the dataType and contentType in explicit Ajax calls. Just replace $.post with $.ajax and use POST.

$('#sendComplexTypes').click(function () {
    var Joe = { name: 'Joe', age: 20};
    var Jane = { name: 'Jane', age: 30};

    $.post("@Url.Action("GotComplexTypes")",
        JSON.stringify({ people: [ Joe,Jane ]}),
        function (result){
            alert("Server replied: " + result);
        }
    );
});

The code above converts the data into JSON format, and will require a ‘people’ property on the server side for binding purposes.

Below is the modified server side code. It receives a ‘data’ (not ‘people’ – remember?), performs binding to the different attributes, matching name to name and data type to data type. Properties and not global fields.

public ActionResult GotComplexTypes(MyPeople data)
{
    return Json(string.Format("People: {0}", data.People.Count()), JsonRequestBehavior.AllowGet);
}

public class MyPeople
{
    public IEnumerable<Person> People { get; set; }
}

public class Person
{
    public string Name { get; set; }
    public int Age { get; set; }
}

Here’s the traffic shown which can help understand whether you’re POSTing JSON strings correctly:

Summary
Apart for being a really cool feature, to be able to bind JSON strings to server side objects, it can save a lot of effort if you thought of doing so yourself. However, this was no picnic. If you don’t follow “the rules” specified above, expect a hard-time and lots of frustration. But don’t despair – it’s worthwhile once it works, and after the first time, its supposed to get much easier.

 
5 Comments

Posted by on 22/07/2012 in Software Development


Tags: , , ,

ASP.NET Ajax file upload using jQuery File Upload plugin

Async Ajax file upload sounded like “science fiction” to me up until some time ago. I remember those days, back in Classic ASP, when I had to employ 3rd party components to have the browser upload files. When ASP.NET introduced FileUpload control, I was truly excited. It was plain easy to use. However, it still required a full postback. Several months ago I saw that AjaxControlToolkit provided an AsyncFileUpload control, and I think that this was the first time I’ve heard of the idea to provide async file upload. However, a quick test I performed back then failed, and I decided to forgo the idea till bugs are fixed and things become more stable. I even developed a File Upload control in Silverlight which provided me with an async upload (as well as other features I needed back then). Basically I continued to use ASP.NET’s excellent FileUpload where possible, up until today, as I had a situation in which I preferred to check on async upload solutions again.

So, a quick search in Google led me to check out this jQuery File Uploader. It looked good, looked like it was working ok, and there was a sample code in C# (WebForms) which got me going quickly (MVC sample is also available). One last thing: although it seems to have jQuery UI support for the “look and feel”, I wanted the most basic functionality of uploading a file asynchronously as I had to reuse graphics from the existing project.

The sample code taught me that html now allows multiple file selection. This was new to me. I tried to track this down and found out the the “multiple” attribute is still in draft, but is already working in some of the newer browsers (unfortunately, IE9 does not seem to support it).

Core ajax upload

In order to get things going, you’ll need the following (stated also in the requirements page):

  1. jQuery 1.6 or above.
  2. jQuery UI 1.8 or above (widget factory is the minimum requirement).
  3. jQuery File Upload plugin. For the most basic implementation, you’ll only need the files jquery.fileupload.js and jquery.iframe-transport.js from that zip.

I based the following code on the “Basic Plugin” instructions. Here’s the client code:

  1. Lines 9-12 are the basic scripts required. I noticed that without the iframe-transport js file, IE doen’t upload anything. As for the jQuery and jQuery UI, you may choose to use the available CDN’s, such as Google Libraries API or Microsoft Ajax Content Delivery Network.
  2. Line 15 activates the fileupload plugin.
  3. Line 16 seems to be required in IE9 for repeated uploads. The documentation states that “By default, the file input field is replaced with a clone after each input field change event. This is required for iframe transport queues and allows change events to be fired for the same file selection, but can be disabled by setting this option to false.” On my machine IE9 failed to upload after the first attempt, unless I set this flag to false. UPDATE: On another website I’m developing, setting this flag to true or false made no difference and IE failed repeated uploads. I’m not sure why, but I just guess that there was some coincidental conflicts between this mechanism and the website’s that caused this to malfunction. What I ended up doing was replacing the file field with jQuery, each time the ‘done’ callback was called, and activated the plugin on the new file field.
  4. Line 17 states that the result is expected on json format.
  5. Line 18 sets the upload url.
  6. Lines 19-23 handle the result using the ‘done’ callback (as shown in the File Upload “basic plugin” page.
  7. Line 28 defines the html file upload with the multiple attribute (“multiple” is not required for running this sample).

The server side implementation is a standard ashx. I based it on Bo Schatzberg’s sample:

  1. Line 10 checks if there are files being uploaded. I wasn’t familiar with the context.Request.Files collection before, so thanks Bo! You may want to log and return a message if there are no files.
  2. Lines 12-14 establish a target location for the uploaded files.
  3. Line 16 gets the file. You may ask yourself why this implementation doesn’t iterate over the context.Request.Files collection to get all the files (after all, we did ask for multiple file selection and uploads). It did, originally, but then I noticed that although the files are multiply selected, they are uploaded one at a time.
  4. Lines 17-18 determine the full file name and perform the actual save.
  5. Lines 20-23 render a json response to the client. Note that line 20 contains a content type of “text/plain” instead of the anticipated “application/json”. As the FAQ states, IE displays a download dialog if the content type is “application/json” as it originally should have been. I didn’t notice this on IE9, but perhaps in an earlier IE this is the case.

Note that the ‘file’ reference in line 16 references a Stream, so you don’t necessarily have to save the file before processing it. You can just use a StreamReader or the like and process the data (thus you can remove lines 12-18 completely if you choose to do so).

There are some other Options you can tweak detailed on this page. More importantly, the options page also documents many callback events which can be used. For example, if you’d like to intercept when a file is selected, you may want to override the default implementation of the ‘add’ operation. As the documentation states, ‘add’ defaults to submitting the data using ‘data.submit( )’. But you might want to perform a validation on the selected file, for example, that the file extension is correct. So your implementation may look like this:

Although the documentation states that it’s possible to block the file selection type using “accept=’image/png’ “, I preferred to test it myself and to provide a validator-like error message. Note that this example also addresses an actual issue I came across: when I tried to use the good old validators on the file element as I always did (for example when a file selection is mandatory, or to test the file extension), they did not work as expected. It’s as if the ‘onchange event life-cycle’ was faulty when it came to the ‘add’ callback. That’s why I reverted to a Label and to checking the file extension “manually” as shown above. Another alternative may be to instruct the upload plug-in not to start uploading the files immediately, and to validate when the user manually clicks on a certain “upload” button.

Form Data

One other feature I found to be useful, is the ability to upload not only the file, but also plain data, either form element values (which is the default), or just custom data. Consider the options to upload with the file user related data, or just plain context data. I used to do this using the query string, but now this can be easily done using the ‘formData’ callback. Here’s the client code:

Here’s the server side code change:

Uploaded file size limitations

Last but not least, in ASP.NET the upload max default is 4096K, which means that you are limited in file upload size. You can change that easily in the web.config using the maxRequestLength:

If you have no control over this, you may want to check the maxChunkSize plugin option, which should be able to upload your files in chunks.

Summary

No doubt that file uploading in the web has come a long way since the days of Classic ASP and even ASP.NET’s FileUpload control. Thumbs up for Sebastian Tschan on his excellent File Upload plugin which seems to provide lots and lots of features (most of which weren’t discussed in this post at all, but are detailed here, such as resume upload and cancel upload).

 
52 Comments

Posted by on 11/09/2011 in Software Development


Tags: , , ,

A quick guide to have jQuery call your ASP.NET PageMethods

I based most of my solution and understandings on several posts from Dave Ward. Although Dave’s excellent posts cover everything written here and more, it still took me quite a while to get this going. That is why I decided to sum up my current experience in this single post, which may be considered as a quick guide to having jQuery call WebMethods (PageMethods in particular).

Assuming that we have the following PageMethod, how do we use jQuery to call it?

There are several stages I had to go in order to use jQuery alongside PageMethods:

  1. Use the correct url for the PageMethod.
  2. Ensure that the client and server use json content types.
  3. Pass arguments to the PageMethod as JSON strings (see the ‘JSON, objects, and strings: oh my!‘).
  4. Interpret the result using the ‘d’ key (see the ‘Waiter, there’s a .d in my msg soup!‘).

Here’s the client code I ended up with (explanation below):

Correct url? No surprises here. In order to invoke the correct PageMethod you have to supply a valid url for that method. It’s easy to use ResolveUrl to get this right.

json: As you can see, I used jQuery’s ajaxSetup method in order to assure that all ajax calls are sent using json. Naturally, you don’t have to do this if you do not want JSON, or if not your calls are json-based. But, no doubt that placing the ajaxSetup call in a js file that gets loaded from a master page is very comfortable to ensure that all your jQuery ajax calls are using the same basis.

JSON arguments: This is the part where it get tricky. As Dave Ward explains so well in his post, ASP.NET expects arguments in JSON format, whereas jQuery sends JavaScript objects (which are mistaken for JSON objects) in query string format (that is, if you try to send JavaScript objects). This means that you have to provide jQuery not with a JavaScript object, but rather with a proper JSON string. This will ensure that jQuery wont parametrize your data in key=value format and will provide ASP.NET the desired JSON format. This is important because it means that if you decide to pass your data object as an invalid JSON string, you’ll be frustrated why the thing isn’t working. That’s why when I learned of the JSON native support that now exists in the popular browsers (IE8, FF 3.5 etc.), it became an obvious solution: using JSON.stringify() ensures that the data gets sent in proper JSON format.

Whats with the ‘d’? As explained in Dave’s post, ASP.NET 3.5 and onwards returns a JSON response from the server with a key of ‘d’, for security purposes (preventing XSS attacks). While ASP.NET Ajax framework automatically handles the new ‘d’ formatted result, so that you’ll end up with the intended data without ever knowing that a ‘d’ was there in the first place, you have to handle this manually when using jQuery and WebMethods. jQuery’s combination of ajaxSetup and dataFilter event allows us to handle response from the server prior to actually calling your “onsuccess” callbacks. The proposed solution in the code above assumes that our site is working only with ASP.NET 3.5 WebMethods, and therefore a ‘d’ is always returned. I believe that usually that will be the case, although a more complex solution for checking if a ‘d’ is there already exists. Anyway, the proposed solution simply takes a JSON string returned from from the server, parses it and extracts the actual data from the ‘d’ key. It then transforms the actual data back to a string (which is what jQuery will expect to get when the dataFilter event has ended…).

Following the described steps should get you to use jQuery with ASP.NET’s WebMethods and PageMethods.

After this has consumed precious time to get going, the big question that remains is: was it worth it. You could argue that using jQuery is faster, or that it seems like MS’s client framework is destined to “retire” in favor of jQuery. But honestly, having to go through all this trouble for calling a PageMethod just seems way too much. In short, personally, I’d rather have the good old script proxies which are extremely easy to use over the not-so-trivial jQuery alternative.

Just a reminder though: in MVC using jQuery is quite trivial.

 
2 Comments

Posted by on 20/05/2011 in Software Development


Tags: , , , ,

ASP.NET MVC Partial View and Ajax “real world” example

If you would like this sample code, right click here and “save as” to download. Then rename to a zip file and open.

In my previous post I have discussed and demonstrated how you can easily use jQuery and a ASP.NET MVC’s Partial View to accomplish an UpdatePanel-like solution. In this post I’d like to demonstrate a “real world” usage of this technique.

I wanted a cool looking Login dialog to popup on request when a user hits a simple “Log On” button, without having to refresh the entire page or redirecting the client to a Login page. In other words, there is no Login page, just a Login dialog. Naturally, I wanted this Log On button to be available across all the pages in the site. This could be easily be implemented using a layout (“Master Page”). But it’s more generic and nice to use a PartialView, to represent that button. More over, the basic code for this already exists in the MVC application template. Simply create a new MVC application and see for yourself. So there’s nothing new so far. However, the code for the login dialog is something new which is required and here I had basically 2 options:

  1. I could render the login dialog as a hidden dialog (“display:none”) in the Partial View (or layout). This is possible, will save a round trip to the server when the user requests to login, but is also quite “ugly” as it is inefficient to render a hidden dialog every time.
  2. I could have an UpdatePanel like implementation. Using a placeholder div, I could request another PartialView from the server on demand. The html rendered will be then “injected” into the placeholder div. I figure that this is way more efficient than the first option and can be considered, well, “nice”.

I decided to go with option 2. It felt more cool and correct, and also provided me with a great opportunity to practice this technique. Here’s the basics:

  1. We’ll create (or rather re-use MVC’s template code) a Partial View to represent a Log On/Log Off button. This will be rendered from the layout onto all pages. This view will also contain a place holder div, which will be injected with the log-in dialog.
  2. We’ll create a Partial View for the login dialog. This is basically a simple div which wraps the username/password textboxes. This will not be rendered anywhere at design time.
  3. We’ll use jQuery’s ‘load’ method to perform an Ajax call to the server, and return the Partial View of the log-in dialog. The dialog’s html will be injected into the place holder described in stage 1.
  4. We’ll create server side code to support the logon/logoff scenarios.

“Strategy”: The login button’s partial view is going to have a wrapping div, which will change according to the whether a user is logged in or not. This will be rendered at first according to the authenticity state, but will change at run-time according to the user’s operations. This will be described in 4 stages below.

Stage 1: Login button (Partial View). I reused MVC’s template code to do this. The entire code is wrapped with a div (‘divLoginButton’), whose contents will dynamically change according to Log on/log off operations performed by the user.

  • Line 1 is the wrapping div.
  • Line 2 is the server side code which decides whether a Log On or Log Off button will be rendered from the server.
  • Lines 4-9 represents a Log Off button. The user is logged in, authenticated, and has not requested to logoff (line 2 makes that decision).
  • Line 7 contains an Ajax call to actually perform the log off, and to replace the div’s entire content with a new state. This really resembles a Web Form’s UpdatePanel’s behavior, only cleaner and more efficient.
  • Lines 13-28 represent a situation that the user is not authenticated and a Log On button is displayed.
  • In line 17 we query whether the login dialog has already rendered from the server. This can happen if the user has clicked the Log On button, the dialog has rendered from the server (line 19), but has not logged in (e.g. clicked the Cancel button of the dialog). In this case, there’s no point in reloading the dialog from the server, so we reset the username/password fields (line 22) and reopen the dialog (line 25).
  • Lines 29-30 is the place holder for the login dialog.

Stage 2: Login dialog (Partial View). I created the new LoginDialog.cshtml PartialView file. This looks like this:

  • Lines 1-13 represent the “dialog”. This is just a basic div with username/password textboxes. This will be displayed as a modal dialog using jQuery UI’s Dialog. Because the dialog is set to autoopen, this will be automatically opened when rendered for the first time.
  • Lines 15-43 contains the JavaScript which will display the window as a dialog. If you’d rather have the JavaScript in a different JS file because you believe that rendering a JavaScript ajax response from the server is a bad thing, it’s also possible.
  • Line 23 indicates a POST ajax call. POST is done for security as I’d rather have the username/password (lines 25/26) not sent in the query string. The Ajax call is for the Login action method in the Home Controller.
  • Line 32 is executed when the result of the Login method is “Success”. This is what does the trick of replacing the “Log On” button with a “Log Off”, similar to the signout process discussed in Stage 1 above. It is possible to return the PartialView directly from the Login action (line 23), but I wanted to render a Success boolean in order to have more control, especially in case the Login fails.

Stage 3: Server side code to support the Log On / Log Off situations.

The comments are probably sufficient, but just in case:

  • Lines 15-18 return the Login Dialog partial view.
  • Lines 21-26 supports a Log Off scenario. Line 23 performs the actual Sign Out. Line 24 instructs the LoginButton partial view that although the user is still authenticated at this point, a Log On button should be rendered and not a Log Off button.
  • Lines 30-33 return a Log On or Log Off button, depending on the authenticity state of the user. Basically this is used after a successful login operation, when we would like to render a Log Off button.
  • Lines 36-42 represents a Login process. Line 38 should be replaced with actual Membership user login validation check. If true, line 40 sets the authentication cookie. Line 41 returns if a successful login was performed. As you can see, in this example the login is always a success.

Stage 4: Render the Login button in the layout (“Master Page”), so it’s visible throughout all the pages.

  • Line 11 represents the Login Button partial view (Log On / Log Off button).
  • Lines 5 and 8 are jQuery UI (required for the modal dialog).

Here’s how it looks. At first, the page is loaded and the Login button is rendered as a Log On button.

Now we click the Log On button. jQuery’s load method performs an Ajax request to the server, and the Login Dialog Partial View is rendered back. Because the JavaScript code which creates the dialog has an autoopen set to true, it automatically opens:

Now we type-in our credentials and click Login. A POST Ajax call to the server performs credential validation and returns a JSON with Success, meaning that the Login went ok and the user has logged in. Now another Ajax call takes place to “refresh” the state of the Login Button to that of a Log Off button. This looks like this:

Finally, when we click the Log Off button, another “refresh” takes place as the server’s LogOff button returns an updated Login Button.

That’s about it. As stated above, you could take the JavaScripts to a different JS file if you feel bad about rendering back JavaScript, or if you think that it’s more efficient either because the network load is reduced or because the JS file will be cached by the browser. It’s also possible to render both a Log On and a Log Off buttons at once and toggle their visibility on the client side, settling just for Ajax calls only to perform the credential validation and to set the cookies. In either case, this isn’t the point of this blog post. The point is to show multiple examples of Partial Views used as Web Forms Update Panels, using jQuery.

 
124 Comments

Posted by on 26/04/2011 in Software Development


Tags: , , , , ,

ASP.NET MVC Ajax using jQuery – Quick Start sample

Ajax is heavily used over the past few years to provide a great UI to the web site. In ASP.NET Web Forms there are several alternatives and my preferred choice is ASP.NET Ajax from Microsoft. In this post I’m excluding Partial Rendering (a.k.a. UpdatePanels), and I’m focusing on implementing a kind of PageMethods  / WebMethods solution in MVC. Partial Rendering is good for some cases (although many would disagree one way or another), but this is a “different discussion”.

Back to WebMethods: What I really like about them, is that the infrastructure lets you enjoy Ajax easily. In short, JavaScript proxy classes are generated for the WebMethods/PageMethods, and they easily used with JavaScript callback functions. JSON objects are handled completely automatically from and to the server.

In ASP.NET MVC things are different. No ScriptManager is there to provide the client proxies and I was expecting lots of work. However, to my surprise, Ajax in MVC was quite easy to perform using jQuery. Credits are in order: you can read a summary of the different methods available for Ajax here. The difference between this post and the referenced post, is that this post is designated to provide a quick start to performing PageMethod-like implementation of Ajax in MVC, and will not cover each and every possibility and case in which a more through reading is required.

Assuming you have an updated jQuery which supports Ajax, basically there are just 2 things to take care of in order to accomplish a successful Ajax implementation:

  1. jQuery client code which performs an Ajax request.
  2. Server-side method which will handle that request.

Starting at the Server-side, here’s a sample code (no [WebMethod] attribute is required):

1: public ActionResult GetGreeting(string name)
2: {
3:     return Content("Hello " + name);
4: }

Note that in Line 3, Content returns plain text response to the client. There are other alternatives such as Json(…), which will return, well, Json.

On the client:

1: <script type="text/javascript" src="../../Scripts/jquery-1.4.4.min.js"></script>
2: <script type="text/javascript">
3: function go() {
4:     $.get("@Url.Action("GetGreeting")" ,
5:         {
6:             name: "Joe"
7:         }, function (data){
8:             alert(data);
9:         }
10:     );
11: }
12: </script>
  • Lines 4-10 represents a simple GET Ajax call from the client, and a callback function upon success.
  • Line 4 specifies the ‘$.get’ for a GET operation (can be substituted for ‘post’ if required).
  • Also in line 4 you can see the server side code which renders an appropriate url for reaching the GetGreeting method. The Action method allows to specify a different controller than the View’s default (as assumed in this sample), and it is also possible to specify Route values.
  • Lines 5-7 represents the data sent to the server. The data is a map of keys and values. The keys have to match the server side argument names.
  • Lines 7-9 represent a callback function in the case of success (failure will be discussed below).

Basically, you can create a new MVC project, copy-paste the code sections to a Controller and a View, set the routing in the global.asax, and it’s supposed to work:

jQuery has different Ajax alternatives. These can be viewed in the documentation. Although this sample accomplishes the minimum required for a successful Ajax operation, one last thing that you might want to consider adding is error handling. There are several methods that error handling can be accomplished (especially if you decide to use $.ajax). One way to handle error handling is as follows:

1: $(document).ready(function (){ 
2:     $("#log" ).ajaxError(function (e, xhr, settings, exception) {
3:         $(this ).text(xhr.statusText);
4:     });
5: });
  • Line 1 isn’t really mandatory if you’re certain that #log has been loaded by the time ajaxError is called. You can also bind the ajaxError to $(document).
  • Line 3 simply injects the status of the error as text within #log (naturally, there are other properties that you can query and display).

Assuming that you want to send arrays to the server, this is a little ‘trick’ in jQuery 1.4 and above, as the default serialization of jQuery has changed. So, assuming that you add an int[] age array to your server side method, your client code should look something like this:

1: function go() {
2:     $.get("@Url.Action("GetGreeting")" ,
3:         $.param({
4:                     name: "Joe" , 
5:                     age: [50,30]
6:         }, true ),
7:         function (data){
8:             alert(data);
9:         }
10:     );
11: }

Line 3 uses jQuery’s param, which is what performs the serialization. The ‘true’ in line 6 specifies that you would like to use the traditional method (which serializes it so that MVC gets it correctly).

You can read more about sending arrays ‘traditionally’ here.

 
8 Comments

Posted by on 15/03/2011 in Software Development


Tags: , , , ,

jQuery numeric textbox with range (well, none or zero to max)

I’ve been looking for a jQuery plugin which will allow me to turn a textbox into a numeric, ranged textbox. After searching a little around the web, experimenting with some of the alternatives without satisfaction, I found some code samples which were partially adequate and I decided on writing specific code for my own purposes.

It’s designed for something quite specific, so it lacks many options which more “generic” plugins have, but it could be of use for developers who require a simple numeric textbox limited by a certain “max number”. There’s no min number involved, but basically you can’t enter characters other than numeric, so it’ll either accept empty, zero or a positive number up to the max specified.

This is my first jQuery plugin ever. My steps were basically:

  1. Write jQuery-based code in my main document which performed what I wanted.
  2. Look up at the documentation for authoring jQuery plugins, and then I copy-pasted one of the examples which I thought suitable.
  3. Copy-pasted the code from step 1 onto the example’s template copied in step 2.
  4. Test and debug.

Here it is:

1: (function ($) {
2:
3:     $.fn.numeric = function (options) {
4:
5:         return this.each(function () {
6:             var  $this = $(this);
7:
8:             $this.keypress(options, function (e) {
9:                 // allow backspace and delete 
10:                 if  (e.which == 8 || e.which == 0)
11:                     return  true;
12:
13:                 //if the letter is not digit 
14:                 if  (e.which < 48 || e.which > 57)
15:                     return  false;
16:
17:                 // check max range 
18:                 var dest = e.which - 48;
19:                 var result = this.value + dest.toString();
20:                 if  (result > e.data.max) {
21:                     return  false;
22:                 }
23:             });
24:         });
25:     };
26: })(jQuery);


1: $( '#myTextbox' ).numeric({max: 99999});

As I’m aware that this plugin lacks lots of functionality, and probably will have it’s own share of bugs, it’ll be great to receive recommendations for other plugins which support numeric and ranged input. I was hoping that jStepper would be my preferred solution as it seemed to have all that I wanted and more, but for some reason it ignores my option settings for not allowing decimals.

If you wish, you can download the code from here: jquery.numeric.js. Just make sure that you rename to js instead of doc.

 
Leave a comment

Posted by on 19/02/2011 in Software Development


Tags: , , , , , , ,

First attempt with jQuery UI

Its been quite some time that I’ve wanted to try out jQuery UI. I admit I did not bother to check if jQuery UI is the “official” library for jQuery, but the demonstrated theme-able widgets looked so amazing, plus the fact that this was based on jQuery – I really wanted to give it a shot. I know, i know – there are many libraries out there. I usually use AjaxControlToolkit, for the past several years actually, alongside other 3rd party controls (which were usually a necessary compromise), alongside jQuery and custom plug-ins.

BTW: At the current time, jQuery UI (1.8.9) has less than ten widgets available, lots of themes and other impressive effects. I only wish it had more widgets available.

In order to quick start with jQuery UI, you simple have to download a jQuery UI + theme, and follow the simple instructions here. The download page consists of many options, so I’ll simply recommend using the box on the right (labeled “Theme”), select a theme and hit the “Download” button. This will download a zip file with the complete package + the selected theme.

Of the different widgets I usually use, having a Modal Dialog is one of my preferred ones. Following the documentation and samples, simply displaying a Modal dialog message is quite simple. If you need a fill-out form, you’ll require a little more help from the documentation (or samples which are embedded within the downloaded file). What I did was a simple copy-paste of the HTML+JavaScript of the Modal Form sample, and started to change them according to my specific needs. I required a single textarea field with a simple validation, so I made the appropriate changes and the dialog worked without any problems. I was quite amazed how easy it is to add buttons to the dialog, with their callback functions.

1: <div  id="dlgNickName"  title="Nickname"  style='display:none;'
2:     <p> 
3:         Creating a nickname makes it easy to ....</p> 
4:     <br /> 
5:     <p class="validateTips"> 
6:         Enter a nickname</p> 
7:     <p> 
8:         <textarea rows="1"  style='width: 450px' name="name" id="name"
                        class="text ui-widget-content ui-corner-all"></textarea></p> 
9: </div>
1: $("#dlgNickName" ).dialog({
2:    height: 240,
3:     width: 500,
4:    modal: true ,
5:     autoOpen: false ,
6:     resizable: false ,
7:     buttons: {
8: 		"Apply" : function () {
9: 			$( "#nickname" ).text(name.val()); 
10: 			$( this ).dialog( "close" );
11: 		},
12: 		Cancel: function () {
13: 			$( this ).dialog( "close" );
14: 		}
15: 	},
16: 	close: function () {
17: 		allFields.val( "" ).removeClass( "ui-state-error" );
18: 	}
19: });

Finally, and without having anything to do with jQuery UI, I used the “what seems to be fantastic” TEXTAREA jQuery Textarea Counter Plugin (which also optionally limits the text and not only counts). This was the better plugin I found for this purpose. Other plugins I’ve looked at did either limit or either count, and those who combined both features didn’t looks as good as this one. It is also very customizable and simple to use.

The result looks like this (I used jQuery UI’s “sunny” theme):

In short, the jQuery UI Dialog Modal Form proved successful, at least for now. jQuery has other powerful widgets I’ll probably use later on. I’m already looking forward to using the ToolTip widget in the oncoming 1.9 release.

 
Leave a comment

Posted by on 15/02/2011 in Software Development


Tags: , ,